When designing a bathroom or dressing space, vanity lighting is one of the most critical yet often overlooked elements. The right lighting not only enhances the beauty of the space but also ensures functionality for everyday tasks such as shaving, applying makeup, or grooming. Poor lighting can create shadows, distort your reflection, or make your bathroom feel uninviting. To avoid these pitfalls, it’s essential to understand the rules for vanity lighting. These are not just design suggestions—they’re practical guidelines that ensure your lighting provides clarity, comfort, and style. In this article, we’ll dive into the key rules for vanity lighting, covering placement, fixture styles, brightness, color temperature, and overall design balance.
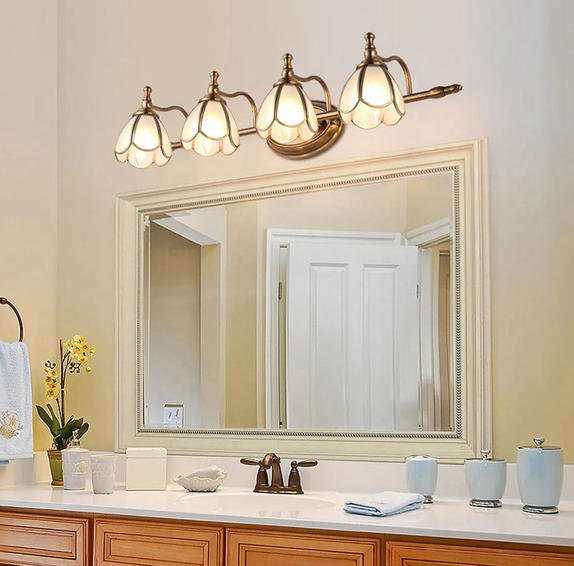
Rule 1: Position Lights at Eye Level One of the most important rules in vanity lighting is fixture placement. Lighting experts recommend positioning light sources at eye level, which is typically around 65 to 70 inches from the floor. When placed at this height, lights evenly illuminate the face without casting harsh shadows under the eyes, nose, or chin. • Best practice: Install sconces or vertical fixtures on either side of the mirror at approximately 28 to 36 inches apart, depending on mirror width. • Why it matters: Light coming from above or below distorts facial features, making tasks like applying makeup more difficult. Eye-level lighting ensures a natural, flattering glow.
Rule 2: Use Layered Lighting Relying on a single overhead fixture is a common mistake in bathroom design. The rule of thumb is to layer lighting so that your vanity area benefits from a balanced mix: 1. Task lighting – Lights near the mirror (sconces, vertical bars, or backlit mirrors). 2. Ambient lighting – Ceiling-mounted fixtures, recessed lights, or chandeliers that brighten the entire room. 3. Accent lighting – Under-cabinet strips or wall washers to highlight architectural features. By combining these three layers, you eliminate shadows, create depth, and achieve both practicality and ambiance.
Rule 3: Match Fixture Size to the Vanity Proportion plays a big role in good vanity lighting. Fixtures that are too small may look underwhelming, while oversized ones can overpower the space. • For single-sink vanities, a pair of sconces or vertical light bars is usually sufficient. • For double-sink vanities, use a fixture above each sink or two sets of sconces. • When choosing a fixture above the mirror, ensure its width is no more than the mirror’s width and typically spans about 75% of it for visual balance.
Rule 4: Consider Brightness and Wattage The bathroom is a task-heavy space, so sufficient brightness is essential. Vanity lighting should provide enough illumination for detailed grooming tasks without being blinding. • Lumens: Aim for 1,500–3,000 lumens total for vanity lighting, depending on bathroom size. • Wattage equivalent: LED fixtures around 15–25 watts each usually provide sufficient brightness. • Dimmers: Always install dimmer switches for flexibility—bright light in the morning, softer light for relaxation in the evening.
Rule 5: Choose the Right Color Temperature Color temperature affects how natural your reflection looks. It’s measured in Kelvins (K), and the sweet spot for vanity lighting is 2700K–3000K, which provides a soft, warm white light that closely mimics daylight. • Below 2700K: Too warm; makes skin appear yellowish. • Above 4000K: Too cool; creates a clinical or bluish effect. • Best range: 2700K–3000K for flattering skin tones and clear visibility.
Rule 6: Avoid Only Overhead Lighting Ceiling-mounted fixtures directly above the mirror often create harsh shadows on the face. While they can add general brightness, they should not be the only source of vanity lighting. • Overhead-only setups accentuate wrinkles, eye bags, and uneven skin texture. • Solution: Pair overhead lighting with side sconces or vertical fixtures to balance shadows.
Rule 7: Use Diffused Lighting Glare from exposed bulbs or overly bright LEDs can be uncomfortable and unflattering. Instead, choose fixtures with frosted glass, fabric shades, or acrylic diffusers. These soften the light, reducing harsh shadows while still providing clarity. • Diffused lighting ensures your face is evenly lit. • It also creates a spa-like, welcoming atmosphere in the bathroom.
Rule 8: Space Fixtures Appropriately The distance between your lights and the mirror is crucial. Lights that are too close can create hot spots, while those too far may not illuminate your face properly. • Place sconces around 3 to 6 inches from the sides of the mirror. • For double-sink vanities, ensure each station has its own dedicated lighting instead of sharing a single overhead source.
Rule 9: Safety First – Follow Bathroom Lighting Codes Bathrooms are moisture-prone areas, which makes safety standards especially important. When selecting and installing vanity lights, ensure they comply with damp or wet location ratings. • Damp-rated fixtures: Suitable for areas near the vanity where moisture is present. • Wet-rated fixtures: Needed for lights near the shower or tub. • Always check local building codes before installation.
Rule 10: Style and Finish Should Complement the Space While function is crucial, vanity lights are also design elements. Choose fixtures that complement your bathroom’s style, whether modern, farmhouse, or transitional. • Modern bathrooms – sleek chrome or matte black finishes, LED light bars, minimalistic designs. • Traditional bathrooms – brushed nickel, bronze finishes, elegant sconces. • Boho or rustic spaces – rattan, brass, or wood accents with warm light. Matching lighting with cabinet hardware, mirror frames, or faucet finishes creates visual harmony.
Rule 11: Use Mirrors Strategically Your mirror plays a vital role in how light reflects throughout the bathroom. A properly sized and positioned mirror can double the light output and enhance brightness. • Backlit mirrors: Combine style with practical, shadow-free illumination. • Frameless mirrors: Allow light to bounce naturally around the space. • Large mirrors: Enhance brightness by reflecting both natural and artificial light.
Rule 12: Prioritize Natural Light (If Available) Whenever possible, maximize natural light in your vanity area. Windows or skylights can provide the most flattering lighting of all. However, balance is key: natural light changes throughout the day, so it should supplement rather than replace artificial sources.
Rule 13: Plan Ahead for Wiring and Installation Vanity lighting should be considered early in the bathroom design process. Retrofitting can be costly, while planning ahead ensures fixtures are at the right height and location. • Pre-plan junction box placement. • Ensure electrical wiring supports dimmers and LED fixtures. • Consult an electrician for code compliance and safety.
Rule 14: Balance Functionality with Atmosphere Bathrooms serve dual purposes: functional grooming and relaxing retreat. The golden rule is to design lighting that can adapt to both. • Bright, task-focused lighting for morning routines. • Soft, dimmable ambient lighting for evening relaxation. • Accent lights for luxury and spa-like vibes.
Conclusion Vanity lighting isn’t just about installing a bulb above the mirror—it’s about creating a space where functionality and style meet. By following the rules for vanity lighting—such as placing fixtures at eye level, layering light sources, choosing the right brightness and color temperature, and ensuring safety—you’ll achieve a bathroom that’s both practical and beautiful. The right vanity lighting eliminates shadows, enhances your reflection, and elevates the overall design of the bathroom. Whether you’re remodeling or starting from scratch, these rules provide a roadmap to a well-lit, comfortable, and stylish vanity space.