Xin Ling at October 08, 2025 at 8:33am CDT
Small2_back_pressure_in_injection_molding-cover

Injection molding is one of the most widely used manufacturing processes for producing plastic parts — from everyday consumer goods to high-precision automotive and medical components. While many factors influence the quality of an injection-molded part — such as temperature, injection speed, and cooling time — one often overlooked but critical parameter is back pressure. In this article, we’ll break down what back pressure is, why it matters, how it affects product quality, and how to optimize it for consistent molding results.

What Is Back Pressure in Injection Molding? In simple terms, back pressure is the resistance applied by the hydraulic system to the screw as it rotates and moves backward during the plasticizing (or recovery) phase of the injection molding cycle. When the screw rotates, it melts the plastic pellets and conveys the molten material toward the front of the barrel. As the molten plastic accumulates in front of the screw, the screw gradually moves backward. However, the machine applies a certain hydraulic resistance to control this backward motion — and that resistance is what we call back pressure. In formula form: Back Pressure = Hydraulic Pressure applied to the screw during recovery It’s usually measured in units like bar, MPa, or psi.

The Role of Back Pressure in the Injection Molding Process Back pressure plays a vital role in controlling the melt quality and improving the consistency of molded parts. Without appropriate back pressure, the molten plastic might not mix properly, leading to inconsistent product quality. Here’s what happens during plasticizing: 1. Plastic pellets are fed into the barrel through the hopper. 2. The rotating screw conveys and melts the material via friction and heat. 3. As the molten plastic accumulates at the front of the screw, the screw moves backward. 4. Back pressure resists this backward motion, forcing the screw to compress and mix the molten material more uniformly. This means back pressure directly influences: • Melt temperature and homogeneity • Density and viscosity of the plastic melt • Degassing (removal of trapped air or moisture) • Shot consistency and part weight stability

Why Back Pressure Is Important Although back pressure might seem like a minor adjustment, it can dramatically impact the final quality of molded parts. Below are the main reasons why it matters. 1. Improved Melt Homogeneity When back pressure is applied, the molten plastic is forced to flow backward through the screw channels and around the flights. This additional mixing ensures a uniform temperature and color distribution in the melt. Without enough back pressure, the material might not mix well, resulting in streaks, color variations, or uneven part strength.

  1. Better Degassing and Moisture Removal Back pressure helps squeeze out trapped air and moisture from the melt. When the screw compresses the material under higher resistance, air bubbles and volatile gases are released and vented through the hopper. This reduces the risk of voids, splay marks, or bubbles in the finished part.

  2. Enhanced Shot Consistency Consistent back pressure ensures that each shot (the amount of material prepared for injection) is the same in volume and density. This improves dimensional stability and part weight consistency, especially important for high-precision products.

  3. Color Mixing and Additive Dispersion When coloring agents, fillers, or additives are used, back pressure helps distribute them evenly throughout the polymer melt. This results in uniform color and balanced mechanical properties across all molded parts.

  4. Improved Surface Finish A uniform and well-mixed melt can fill the mold cavity more evenly, reducing defects such as flow marks or weld lines. This results in smoother, more aesthetic surfaces — a must for consumer-facing products.

How to Adjust Back Pressure Most modern injection molding machines allow you to adjust back pressure directly through the control panel. Here’s a general procedure: 1. Start with Low Pressure Begin at the lowest possible setting (e.g., 2–5 bar) to observe the basic melt behavior. 2. Gradually Increase Raise back pressure in small increments (e.g., 2–3 bar at a time) while checking for improved melt uniformity and part consistency. 3. Observe Melt and Part Quality Look for color uniformity, absence of bubbles, and stable shot weight. These are signs of proper melt mixing. 4. Monitor Screw Recovery Time Excessive back pressure increases recovery time. If the screw takes too long to recharge, reduce pressure slightly. 5. Fine-Tune for Each Material and Mold Once an optimal setting is found, record it as part of the process parameters for future production runs.

Relationship Between Back Pressure and Other Parameters Back pressure doesn’t work in isolation — it interacts closely with other molding parameters. 1. Screw Speed Higher screw speed increases shear heating. When combined with high back pressure, it can overheat the melt. Lower the screw speed if you raise the back pressure significantly.

  1. Barrel Temperature Raising back pressure increases melt temperature naturally. So, you might not need as high a barrel temperature when back pressure is optimized.

  2. Cycle Time Higher back pressure means longer screw recovery, increasing cycle time. Finding the right balance is crucial for maintaining productivity.

  3. Part Weight and Dimensions Inconsistent back pressure causes variations in melt density, leading to inconsistent part weights or dimensions. Keeping back pressure stable ensures repeatability.

How Back Pressure Affects Energy Consumption and Machine Wear While moderate back pressure improves melt quality, it also increases energy consumption and mechanical load on the screw and barrel. High resistance means the hydraulic system must work harder, consuming more power and accelerating screw wear. To minimize wear and energy costs: • Keep back pressure as low as possible while maintaining melt quality. • Use proper lubrication and maintenance. • Choose wear-resistant screw materials if molding filled or abrasive resins.

Best Practices for Optimizing Back Pressure 1. Use the Minimum Effective Pressure Apply just enough back pressure to achieve good melt mixing and shot consistency — nothing more. 2. Monitor Melt Temperature Regularly Keep track of any temperature rise caused by shear heat from back pressure. 3. Record and Standardize Settings For consistent production, always document back pressure values along with other molding parameters. 4. Avoid Sudden Adjustments Small incremental changes give better control and prevent overcompensation. 5. Train Operators Properly Ensure machine operators understand the effects of back pressure and how to fine-tune it safely.

Conclusion Back pressure in injection molding may seem like a small parameter, but it has a big impact on melt quality, consistency, and part performance. By applying the right amount of resistance during the plasticizing phase, manufacturers can achieve: • Better color and additive mixing • Reduced air bubbles and voids • More consistent shot sizes • Improved surface finish and mechanical strength However, excessive back pressure can lead to overheating, material degradation, and longer cycle times. The key is to find the balance point that delivers high-quality parts with minimal energy consumption and machine wear. Whether you’re molding simple plastic housings or complex engineering components, understanding and controlling back pressure is essential for producing repeatable, high-quality results.

0 Comments 1 Vote Created
Small2_iso_standard_for_injection_molding-2

Injection molding is a mature, highly precise manufacturing method primarily for plastics (and sometimes elastomers). Because many industries demand consistent quality, interchangeability of parts, and safety assurance, ISO (International Organization for Standardization) standards play a key role in defining norms for processes, testing, safety, quality, and terminology. However, there is no single ISO standard that covers everything about injection molding. Rather, a network of ISO standards applies to various aspects—test specimens, machinery safety, testing protocols, tolerancing, quality systems, domain-specific standards, etc. This article surveys the major ISO standards relevant to injection molding: what they cover, how they are used in practice, and what considerations manufacturers and designers should be aware of.

Brief Overview: What Is ISO? ISO (International Organization for Standardization) is a global, non-governmental body that develops and publishes international standards across many domains—mechanical engineering, materials, quality systems, safety, information technology, environment, etc. ISO standards are voluntary (unless adopted by regulatory bodies), but in many industries and supply chains they become de facto or mandated by contracts, regulations, or customer requirements. Meeting relevant ISO standards can help companies ensure consistency, quality assurance, compliance, and global acceptance. In the context of injection molding, ISO standards typically address: • Safety requirements of machinery • Test specimen molding and material testing • Terminology, symbols, dimensions • Quality management systems (e.g. ISO 9001, ISO 13485) • Tolerancing and geometric dimensioning control • Domain-specific standards (e.g. medical, automotive) Let’s examine the key standards.

Key ISO Standards in Injection Molding 
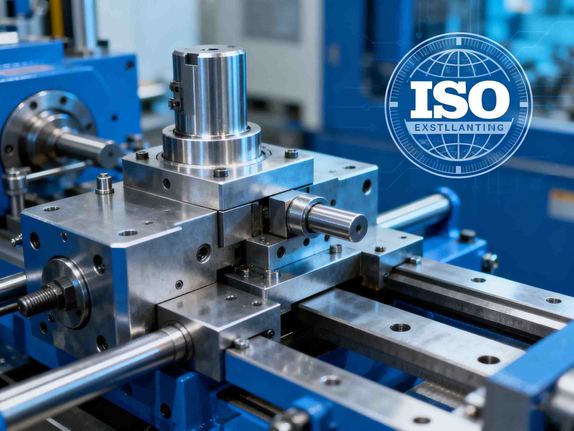
ISO 20430:2020 – Plastics & Rubber Machines: Injection Molding Machine Safety Requirements One of the most directly relevant ISO standards to injection molding machinery is ISO 20430:2020, titled “Plastics and rubber machines — Injection moulding machines — Safety requirements”. Scope and Purpose • This standard specifies the essential safety requirements for the design and construction of injection molding machines (hydraulic and/or electrical drive) used in processing plastics and/or rubber. • It addresses hazards, hazardous situations, and events relevant when machines are used as intended or under reasonably foreseeable misuse. • It also interfaces with ISO 12100 (general machine safety principles). • Exclusions: It does not cover mold design or exhaust systems, nor machines built prior to that standard’s publication date. Why It Matters • For machine builders and molders, compliance with ISO 20430 ensures safety in operation, helps meet regulatory safety obligations, and reduces liability risk. • National or regional safety regulations often reference standards like ISO 20430 (or harmonize with them). • It mandates guards, interlocks, pressure relief, emergency stops, safe access provisions, and protective devices. When designing or selecting injection molding equipment, manufacturers must be aware of ISO 20430’s clauses and ensure that all safety elements align with it.

ISO 294 Series – Molding of Test Specimens A family of ISO standards addresses the molding of standard test specimens for plastics under controlled conditions so that comparative material property testing can be reliable. Among these: • ISO 294-1:2017 — Plastics — Injection moulding of test specimens of thermoplastic materials – Part 1: General principles, and molding of multipurpose and bar test specimens. • ISO 294-5:2017 — Plastics — Injection moulding of test specimens of thermoplastic materials – Part 5: Preparation of standard specimens for investigating anisotropy. ISO 294-1:2017 — Key Points and Use • Defines general principles and molding conditions for test specimens (types A1, B1) used in standardized tests (e.g. tensile, flexural). • Ensures that specimen molding is reproducible and that results from different labs or studies are comparable. • It clarifies how to report the molding parameters (temperatures, pressures, times) in a standard format to make data transparent and consistent. • Also ensures that the molds used for specimens can fit in existing molding machines, and that the mold plates are interchangeable. ISO 294-5:2017 — Key Points • Focuses on anisotropy (directional dependence of properties) in molded thermoplastics, often due to molecular orientation or filler alignment. • Specifies a “Type F” mold (80 × 120 mm nominal) for making plate specimens to study anisotropy in tensile properties. • These specimens may not aim for production parts, but are critical for material characterization in research, validation, and material datasheets.

Why This Matters in Practice • When material suppliers publish properties (tensile, modulus, impact) or when designers perform simulation (e.g. mold flow), the test data must originate from a reproducible and comparable standard molding process. ISO 294 series ensures that. • Consistency in test specimen molding conditions helps reduce “scatter” in material property data, improving the reliability of calculations, simulations, and design decisions. Thus, for organizations doing polymer materials testing, polymer selection, or molding validation, these ISO standards are essential.

ISO 12165 / ISO 12180 etc. – Terms, Vocabulary, Components In the domain of mold tooling and manufacturing, there are ISO standards covering terms, symbols, and basic tooling components relevant to injection molding. • ISO 12165 — Tools for moulding — Components of compression and injection moulds and diecasting dies — Terms and symbols. This standard helps unify nomenclature for mold parts (cavities, cores, ejector pins, runners, etc.). • ISO 12180 — Geometrical product specifications (GPS) — Cylindricity / tolerance operators for cylindrical form, which can apply to features in molds or molded parts requiring cylindrical tolerances. (Part of broader GPS family) While these are not “injection molding” specific, they ensure all parties (designers, mold makers, quality inspectors) speak the same language and avoid ambiguities.

ISO 9001, ISO 13485, and Related Quality Management Standards Although ISO 9001 is not specific to injection molding, it is often a requirement or expectation in the molding supply chain. ISO 13485 is more specific to medical devices, which often involve injection molded parts. ISO 9001 – Quality Management System • ISO 9001:2015 defines a generic QMS (quality management system) framework: customer focus, leadership, engagement of people, process approach, improvement, evidence-based decision making, relationship management. • Many molders, especially those in consumer, automotive, electronics, or general products supply chains, maintain ISO 9001 certification as a baseline. (For instance, many injection molding service companies advertise ISO 9001 certification) • Advantages: consistency, traceability, audits, process control, customer confidence, ability to compete for contracts requiring ISO compliance. ISO 13485 – QMS for Medical Devices • ISO 13485:2016 is a QMS standard specific to medical devices, specifying requirements for quality and regulatory compliance in design, production, and servicing of medical equipment. • When injection molding is used to manufacture medical parts or components, adherence (or certification) to ISO 13485 is often required by clients and by regulatory agencies. Prototool’s site cites using ISO 13485 for manufacturing in medical industries. • ISO 13485 includes tighter controls, risk management, more documentation, traceability, validation, and verification requirements compared to a generic QMS. In Summary: For injection molding companies, ISO 9001 is often the baseline quality certification. If you're in medical or related fields, ISO 13485 becomes directly relevant. These standards dictate how you document, control, validate, and audit every stage of your manufacturing, but they do not prescribe particular molding process parameters.

Tolerancing and Dimensional Standards: ISO 286 (IT Grades), Others When specifying dimensions, fits, and tolerances for parts (including molded plastics), the broader ISO system of tolerances and fits (e.g. ISO 286) is relevant. The concept of IT (International Tolerance) grades is used globally, including in plastic part specifications. • ISO 286 defines standard tolerance grades (IT01 to IT18) for nominal sizes and how much variation is allowed based on size and precision class. • While ISO 286 is general (not specific to injection molding), many design engineers reference it. In fact, in some forums, engineers note that injection molded parts may struggle to meet very tight ISO tolerance grades (e.g. IT5, IT6) due to material shrinkage, molding variability, and other factors. (As discussed in a forum: “you’ll struggle to use the standard ISO tolerances … use DIN 16 901 tolerances, which account for shrinkage, etc.”) • Hence, in part specifications, designers often specify tolerances relative to what injection molding can reliably achieve, informed by ISO tolerance norms. Thus, while not strictly an “injection molding ISO standard,” ISO 286 and the tolerancing system must be understood and applied carefully in molded part design.

How “ISO for Injection Molding” Is Interpreted in Industry Because there is no single all-encompassing ISO for injection molding, industry usage of “ISO for injection molding” often means a combination of: 1. Safety Machinery Standards (e.g. ISO 20430) 2. Testing & Specimen Molding Standards (ISO 294 series) 3. Quality Management & Certification (ISO 9001, ISO 13485) 4. Terminology, tolerancing & tooling component standards (ISO 12165, ISO 286, etc.) 5. Supplemental standards / industry guidelines (e.g. SPI, ASTM, DIN, company-specific practices) Many injection molding companies advertise “ISO injection molding standards” in their marketing, which typically refers to their internal or external adherence to ISO 9001, ISO 13485, and possibly compliance with ISO safety or testing standards. For example, Protolabs lists ISO 9001:2015 and ISO 13485 certifications for their injection molding services. 
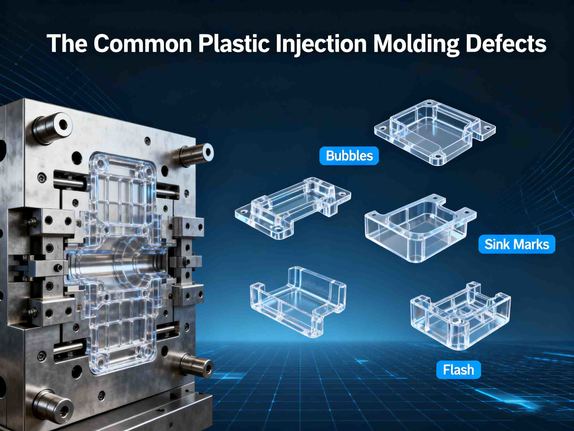
Prototool’s article similarly speaks about “ISO Injection Molding Standards” as umbrella term for applying ISO quality measures to reduce defects, maintain uniformity, and standardize processes across large part volumes. Prototool Their discussion focuses more on ISO as a quality / management standard rather than detailed molding-specific technical ISO. Thus, when someone asks “What is the ISO standard for injection molding?” a good answer is: a set of ISO standards rather than a single one, covering safety, test methods, quality, tolerancing, and more.

Practical Implications and Best Practices Here’s how these ISO standards matter in real-world injection molding operations: Safety & Compliance (ISO 20430) • Ensure that all new injection molding machines or retrofits comply with the safety clauses of ISO 20430 (guards, interlocks, emergency stops, safe access, hazard management). • Maintain documentation, risk assessments, safety verification, and regular audits to support conformance. Material Testing & Validation (ISO 294 Series) • When qualifying a new resin or change material supplier, molding test specimens per ISO 294-1 ensures that mechanical properties are consistent and comparable. • Use ISO 294-5 or similar to explore anisotropy or directional properties, especially for fiber-reinforced or filled polymers. • Include molding parameter records (temperatures, pressures, times) following the reporting format per ISO. Quality System (ISO 9001 / ISO 13485) • Implement a robust QMS that addresses injection molding processes: design control, process validation, change control, traceability, audits, nonconformance handling, continuous improvement. • For medical or regulated parts, satisfy ISO 13485 additional requirements (risk management, documentation, validation) to gain customer and regulatory confidence. • Use the QMS to monitor defect rates, process capability (Cp, Cpk), corrective actions, and continuous improvement cycles. Tolerance & Design (ISO 286, ISO 12165, etc.) • When creating part drawings, set tolerances achievable in injection molding, and reference ISO tolerance systems (IT grades) as guidance. • Avoid over-tight tolerances that are beyond molding capability; consult molders about what tolerances are realistic based on material, part size, features, shrinkage, and process stability. • Use consistent terminology (cavities, cores, runner, gate) per ISO tooling vocabulary (ISO 12165) to avoid miscommunication between designers and mold makers. Contracts, Customer Requirements, and Certification • Many OEMs or regulated sectors (automotive, medical, aerospace) explicitly require suppliers to be ISO certified (9001, 13485) or to follow certain ISO standards. Having documented compliance with ISO 20430, ISO 294, etc. can help in compliance reviews. • In supplier audits or RFQs, you may be asked to show how you conform to relevant ISO standards (safety, test, quality). Maintaining documented procedures and records aligned with ISO is beneficial. Limitations & Cautions • ISO standards often describe minimum or baseline requirements, not the full scope of best practice or what is optimal for a particular product or material. • Many molding challenges—warpage, cooling optimization, gate design, simulation—are not directly prescribed by ISO; they rely on engineering judgment, empirical knowledge, or other standards (ASTM, SPI, Plastics Institute guidelines, etc.). • ISO tolerancing systems (e.g. ISO 286) are general; injection molding has unique constraints (material shrinkage variability, process variation) that may limit how tightly you can apply those tolerances. • Implementation and audit focus should emphasize that documented compliance and traceability is as important as the nominal standard.

Challenges in Applying ISO Standards to Injection Molding Although ISO standards provide a solid foundation, real-world implementation can confront challenges: 1. Standards Interpretation & Ambiguity Some ISO standards (especially machinery safety) have ambiguous or broad language. Translating them into machine design or factory practice may require expert interpretation or legal guidance. 2. Overhead of Documentation & Controls Especially for smaller molding shops, implementing full ISO systems (documentation, audits, controls) can be resource-intensive. Many must balance the cost vs the business benefits. 3. Keeping Up with Revisions ISO standards are periodically reviewed and revised. Staying current is a challenge. For example, ISO 20430 is relatively new (2020). 4. Differing Customer / Regional Requirements Some customers or regulatory bodies may require adherence to related or overlapping standards (ASTM, DIN, CE directives, FDA, etc.), which may not map exactly to ISO. Harmonizing all is nontrivial. 5. Technical Gaps ISO standards often stop short of prescribing optimal technical performance (e.g. how to optimize runner systems, or simulation methods). Those gaps must be filled by internal standards, industry bodies, or research. 6. Tolerance Capabilities vs Standard Tolerancing Many molded parts cannot practically meet very tight ISO tolerance grades because of polymer behavior, shrinkage, cooling nonuniformity, etc. Thus, designers must negotiate tolerances that are both safe and manufacturable. Nonetheless, the benefits of ISO compliance—especially in regulated industries or in supply chains requiring consistency—often justify the effort.

Tips for Designers, Molders & Quality Engineers Here are some practical recommendations when engaging with ISO standards in injection molding: • Start by mapping customer / regulatory requirements: Determine which ISO standards (e.g. ISO 13485, ISO 9001, safety/machinery, etc.) are required by your clients or industry. • Adopt modular compliance: You don’t need to cover all ISO standards. Focus on those relevant to your domain (safety, test, quality, tolerancing) and expand over time. • Document Thoroughly: For standards like ISO 20430 (machine safety) or ISO 294 (test molding), maintain records, verification, risk assessments, molding logs, calibration records, etc. • Use standards as baseline, not total solution: Combine ISO requirements with good engineering practices, simulation tools, mold flow, empirical design, and industry guidelines. • Educate your team: Ensure engineers, operators, mold makers, quality personnel are familiar with relevant ISO clauses and can translate them into daily tasks, audits, inspections. • Regular audits & reviews: Conduct internal and external audits to ensure compliance, catch nonconformances, and drive continuous improvement. • Engage with standard updates: Monitor revisions in relevant ISO standards (safety, testing, materials) so you aren’t caught by obsolescence.

Summary & Takeaways • There is no single ISO standard that fully encapsulates all aspects of injection molding. Rather, a constellation of ISO standards apply, each governing particular facets—machine safety (ISO 20430), test specimen molding (ISO 294 series), vocabulary/tooling (ISO 12165), tolerancing (ISO 286), and quality systems (ISO 9001, ISO 13485). • ISO 20430:2020 is the primary standard addressing safety for injection molding machines. • ISO 294-1 and ISO 294-5 are key for molding of standard specimens to ensure reproducibility of material property data. • Quality management via ISO 9001 is often mandatory in production supply chains; ISO 13485 is essential when producing medical device components. • Designers must balance ISO tolerancing systems (e.g. ISO 286) with the real constraints of injection molding processes. • Implementing ISO standards demands discipline: documentation, audits, training, process control, and continuous review. In practice, saying “We comply with ISO standards in injection molding” means that your operation is aligned with the relevant ISO norms—machine safety, specimen testing protocols, quality systems, and proper tolerancing practices—while filling in the engineering gap with domain expertise, simulation, and rigorous process control.

0 Comments 1 Vote Created
Small2_sis_in_3d_printing-cover

Selective Inhibition Sintering (SIS) is an additive manufacturing (3D printing) process that offers an alternative to more conventional powder-based metal or polymer sintering techniques like Selective Laser Sintering (SLS). Developed by researchers (notably at the University of Southern California), SIS seeks to produce parts by inhibiting sintering (or melting) in certain regions, rather than directly sintering or melting all regions via high-energy sources (lasers, electron beams, etc.). What is SIS in 3d printing? In simpler terms, in SIS you deposit a base powder (metal or polymer), then selectively apply an inhibitor over the areas you don't want to sinter. Afterwards, you subject the whole thing to a sintering furnace (heat), which fuses the non-inhibited regions to form the final solid object, while the inhibited regions remain loose or non-sintered, acting as sacrificial or “support” material. After sintering, the loose material can be removed, leaving the desired geometry.

How SIS Works — The Process Steps Here is a breakdown of the steps involved in SIS: 1. Powder Bed Preparation A layer of base powder is spread onto a build bed. The powder could be metal, polymer, or ceramic. The properties of the powder—particle size, sintering temperature, flowability—are critical. 2. Selective Inhibitor Deposition Over that powder layer, an inhibition agent (sometimes delivered via an ink-jet printhead) is deposited. The inhibitor is applied only to regions where you do not want the powder to sinter during the sintering step. The geometry of the inhibitor pattern corresponds to the “outside” or unwanted powder regions.  This inhibitor can be a liquid solution (e.g. sucrose + surfactant, or other chemical) in early polymer/metal versions.  For ceramics, dry powder inhibitors are also used (because high sintering temperatures can make liquid inhibitors impractical). 3. Layering / Repetition Additional layers of base powder are added, and inhibitor gets applied in each layer as needed, building up the 3D part. The shape of the inhibitor region between the region to be sintered and the surrounding powder forms essentially a temporary mold or shell/moat. 4. Sintering The whole build — including both inhibited and non-inhibited regions — is placed in a furnace and heated to the sintering temperature of the base powder. Because inhibited regions have been treated (or coated) to prevent or slow down sintering (or require a higher temperature than is provided), only the non-inhibited powder fuses into a solid component. 5. Post-Processing / Removal of Loose Powder After sintering, the inhibited (non-sintered) powder, which did not fuse, remains loose or only weakly bound. This powder is removed (e.g. by brushing, sand-blasting, or simple mechanical removal) leaving the final object. 6. Finishing As with other metal/ceramic sintered parts, depending on required tolerances and surface finish, additional finishing steps (machining, polishing, possibly secondary sintering or annealing) may be needed. SIS’s output depends on the fidelity of the inhibitor deposition, powder characteristics, and sintering behavior.

Why “Inhibition” Instead of Direct Fusion? SIS inverts some of the typical approach in powder sintering / fusion processes. Most conventional powder bed fusion (PBF) or sintering-based AM methods use a heat (laser, electron beam, or other) to selectively fuse or melt the powder in target regions (for example SLS for polymers, Direct Metal Laser Sintering (DMLS) for metals, etc.). SIS instead selects where not to fuse by applying an inhibitor, which means that: • Only the “negative” space (the region outside the desired part) needs to be defined explicitly via inhibitor deposition rather than “flooding” the whole powder bed with energy except in unwanted zones. • The energy source (sintering furnace) can be relatively simple compared to precise lasers or beam systems. • Potentially lower cost, simpler hardware, and maybe better scalability for larger parts, because the challenge of focusing and scanning a beam is replaced with an inhibition mechanism + furnace sintering.

Advantages of SIS over Traditional Methods Selective Inhibition Sintering offers a number of potential benefits, particularly for certain applications or use-cases. Some of the key advantages are: 1. Lower Equipment Cost Because the process does not require high-power lasers, scanning optics, or electron beams for selective melting, the hardware cost can be significantly reduced. The sintering furnace, controller, powder spreader, and inhibitor deposition mechanism are simpler in many respects. 2. Potential Speed Gains for Certain Geometries Since only the part boundary (i.e. inhibitor deposition) needs precise patterning, and the interior of the part is just base powder, there may be less work per layer, potentially speeding up deposition for large solid volumes. 3. Material Efficiency / Waste Handling The use of loose powder in non-inhibited regions means that the same base powder is being used for both part and surrounding material; only the inhibited powder (or inhibitor) is sacrificial. If managed properly, this can reduce some of the complexity of removing support structures or worrying about over-spray or beam width effects. 4. Scalability for Larger Parts As the part size increases, laser or beam systems often need more energy, face issues of focus, heat diffusion, scan path, etc. SIS avoids some of those drawbacks because the sintering happens more uniformly in a furnace rather than by scanning. 5. Flexibility of Materials SIS has been explored not only for metals and polymers but also ceramics. For ceramics, applying an inhibitor helps in creating viable green parts and then sintering. This can avoid some of the complexity of binder-based ceramic AM or laser sintering ceramics, which can suffer from high energy, warpage, and other defects. 6. Simplified Support / Shape Boundaries Because the inhibitor effectively defines the “outside”, support structures or over-hangs might be handled in new ways, possibly reducing the need for adding physical supports in some cases. The loose powder outside inhibited regions acts somewhat like a support until removed.

Challenges, Limitations & Technical Hurdles Like any emerging technology, SIS also faces material, processing, and design challenges that must be addressed before it can be widely adopted. Some of these are: 1. Inhibitor Material & Effectiveness  The inhibitor needs to sufficiently prevent sintering or melting in treated areas without interfering with desired regions.  It must have stability under sintering temperatures (i.e. either a higher sintering/melting point, or otherwise not degrade).  For liquid inhibitors, issues like over-penetration (inhibitor seeping beyond intended boundary), diffusion, and residue must be managed.  For ceramics or higher temperature sintering, liquid inhibitors often become ineffective or problematic; dry powder inhibitors are one possible solution but bring their own handling issues. 2. Resolution & Precision  The fidelity of the final part depends heavily on how accurately the inhibitor can be deposited. Any misalignment, overspray, or blur will degrade the boundary between the sintered part and non-sintered powder.  Powder particle size also matters: larger particles reduce resolution; very small particles are more expensive, more difficult to handle, more prone to agglomeration or flow issues. 3. Shrinkage & Distortion  Sintering processes usually cause shrinkage; parts may deform. The presence of non-sintered envelopes or boundaries defined by inhibitors introduces additional complexity in predicting how the final geometry will result.  Uniform heating in furnace vs localized sintering may still cause temperature gradients, warpage, or defects if not well controlled. 4. Post-Processing of Loose Powder / Cleanup  Removing inhibitors and non-sintered powder cleanly may be difficult, especially in fine features or internal cavities.  The leftover powder may be contaminated by inhibitor, which could complicate reuse of powder or recycling. 5. Material Cost & Powder Handling  Some powders (especially metal or ceramic powders) are expensive, sensitive (oxidation, moisture), and pose health/safety issues. Handling large amounts safely, or reusing powder, is nontrivial.  The inhibitor itself has to be managed, stored, and disposed of appropriately. 6. Thermal Management  Sintering temperatures for metals/ceramics are high; thermal gradients, furnace uniformity, and heating rate control are all critical.  The inhibitor’s thermal profile must be well known to ensure it behaves as expected (i.e. remains non-sintered or at least not fused) during heating. 7. Throughput / Cycle Time  Although SIS promises some speed gains, the overall process (powder spreading, inhibitor deposition, furnace sintering, post removal) may still be relatively slow for certain applications compared to fast PBF systems (for thin/layered parts).  Cooling time, sintering dwell time, and post-processing add to total production time. 8. Software & Process Control  You need good software to convert CAD to instruction layers for both powder and inhibitor deposition.  Proper control of deposition, environmental conditions (e.g. temperature, humidity), and monitoring is necessary.

Applications and Use Cases While still largely research-stage in many respects, SIS has potential (or demonstrated) applications in several fields: • Metal 3D Printing for Cost-Sensitive Use SIS could allow production of metal parts with lower capital cost machines, enabling smaller firms or labs to do metal AM with less expensive equipment. • Ceramic Parts Fabrication Ceramics are hard to print via traditional techniques without extensive post-processing. SIS offers ways to make complex ceramic parts with less need for binders or extremely high-energy laser sintering. • Large Structural Components For large parts where lasers/EB machines have issues (power, focal accuracy, scanning speed), SIS may offer a route to scalable production. • Prototyping / Research Early prototyping of metal/ceramic shapes where cost or equipment availability is limited. • Space / In-Situ Manufacturing Some works mention SIS being particularly interesting for in-space or off-Earth manufacturing (lunar regolith, etc.), since available raw materials could be used, and simpler equipment might be more feasible.

Research Highlights & Case Studies Some interesting studies and results include: • The original SIS development for polymers and metals by Khoshnevis et al., which demonstrated that SIS can produce high-quality parts and promised disruptive potential for metal AM. • SIS applied to ceramics: in “Selective Inhibition Sintering for ceramics,” the research shows using dry powder inhibitors (e.g. magnesium oxide, aluminum oxide) to delimit the sintering boundaries. Preliminary experiments showed feasible separation of parts from redundant powder and usable mechanical properties. • Tests using lunar regolith simulant: studies have explored SIS as a way to manufacture building/landing-pad tiles in space environments using in-situ resources. The idea is the base powder being something like lunar regolith simulant, and using an inhibitor (of higher sintering point) as the boundary. After sintering, parts are separated from the uninhibited (non-sintered) powder.

Practical Considerations When Using SIS For anyone thinking of using or developing a SIS process, here are practical points to pay attention to: 1. Powder Selection and Preparation  Particle size distribution: fine, uniform powders help with resolution and uniform sintering.  Cleanliness: no moisture, contaminants. 2. Inhibitor Design  Chemistry: effective inhibition without interfering with base powder.  Delivery mechanism: inkjet heads, spray, or nozzles for dry powder.  Thickness and fidelity: minimal over-penetration; sharp boundaries. 3. Sintering Furnace Design / Thermal Control  Uniform temperature distribution.  Proper heating and cooling rates to reduce thermal stresses. 4. CAD / Layering / Slicing Software  Must support the dual-material/layer deposition: base powder + inhibitor patterns.  Must be able to generate inhibitor “shells” or boundary paths accurately. 5. Post-Processing & Purity  Removal of non-sintered powder and inhibitor.  Surface finishing and any required densification. 6. Quality Control & Testing  Tests for density, mechanical properties (strength, toughness).  Dimensional accuracy vs. CAD model.  Material composition (to ensure no unwanted residual inhibitor contamination). 7. Safety & Handling  Powder handling safety (especially metals, ceramics).  Inhibitor materials: chemical safety, disposal.  Thermal equipment safety.

Limitations & Open Research Questions While promising, SIS has not yet become a widespread industrial standard. Key open questions include: • What is the long-term mechanical performance (fatigue, toughness) of SIS parts compared to fully laser fused ones? • How fine can the resolution be pushed (both in boundary sharpness and internal feature detail)? • Can inhibitor materials be standardized, cost-effective, and easily applied at scale without compromising performance? • How efficiently can uninhibited powder / loose powder be recycled or reused? • What are the limits in terms of part size, complexity, overhangs, internal channels, etc.? • What are the economics when considering full process cost (powder + inhibitor + furnace + post-processing) vs conventional PBF or other AM methods?

Future Prospects Given its advantages and challenges, here are some likely areas for future development of SIS: • Advanced Inhibitor Materials & Deposition Systems Better inhibitors that are reliable, less costly, easy to deposit accurately, perhaps self-limiting, maybe even smart inhibitors responsive to temperature. More precise deposition hardware (improved inkjet, spray, or powder nozzle systems). • Hybrid Processes Combining SIS with other AM methods; for example, using SIS for bulk volume or structure, then using laser sintering or other techniques for finer detail or finishing. • Application-Specific Use Cases Industries where cost reduction for metal/ceramic AM is very desirable: aerospace, space exploration, architectural ceramics, large manufacturing, maybe construction. • Supply Chain & Material Ecosystems Better powders, better inhibitor supply, better recycling of powders, standardization of process materials to reduce cost and variability. • Automation & Digital Control Improved process monitoring, closed-loop control of temperature, inhibitor deposition, furnace atmosphere etc. to ensure consistent parts. • Regulatory & Certification For critical parts (medical, aerospace), SIS parts will need to prove their reliability, structural integrity, and reproducibility.

Conclusion Selective Inhibition Sintering (SIS) is an intriguing and potentially disruptive technology in the additive manufacturing landscape. It offers a different route to produce metal, polymer, and ceramic parts, by inverting the typical “selective fusion” approach and instead using selective inhibition to define where sintering should not occur. This can lower equipment complexity, potentially reduce costs, and offer scalability advantages, particularly for larger parts or those made from ceramics. However, SIS is still a developing technology. Its success in industrial adoption will depend on solving challenges around resolution, inhibitor materials, thermal management, powder reuse, and overall process economics. But given the research to date, SIS is a strong candidate for future growth, especially in sectors where traditional metal/ceramic 3D printing is costly or impractical.

0 Comments 1 Vote Created
Small2_factor_to_consider_in_injection_mold_design-2

Injection molding is one of the most widely used manufacturing processes for producing plastic parts in high volume with consistent quality. At the heart of this process lies the injection mold design—a critical step that determines not only the efficiency of production but also the performance, durability, and cost-effectiveness of the final product. A well-designed mold reduces cycle time, minimizes defects, and prolongs tool life. On the other hand, poor design choices can lead to warpage, sink marks, excessive scrap, or costly maintenance. Whether you are an engineer, a product designer, or a manufacturer, understanding the key factors in injection mold design is essential for successful project execution. This article explores in depth the factors to consider in injection mold design, covering technical, material, and economic perspectives to guide you toward creating effective and reliable molds.

  1. Understanding Injection Mold Design Basics Before diving into the factors, it’s important to understand what injection mold design entails. An injection mold is a precision tool usually made of hardened steel or aluminum, which creates plastic parts by shaping molten resin under high pressure. The mold typically consists of two halves: • Core half (stationary side) • Cavity half (moving side) When these halves close, they form a cavity that matches the shape of the desired product. Molten plastic is injected into this cavity, cooled, and then ejected to produce the finished part. Thus, mold design involves determining how these components work together, taking into account material flow, cooling, ejection, strength, and manufacturability.

  2. Key Factors to Consider in Injection Mold Design 2.1 Part Design and Geometry The design of the part itself is the first factor influencing mold design. Complex geometries can complicate mold construction, increase costs, and lengthen cycle times. • Wall Thickness: Uniform wall thickness is critical to prevent warpage, shrinkage, and sink marks. Sudden changes in thickness should be avoided. • Draft Angle: Adding a draft angle (typically 1–2°) helps with easy part ejection, reducing stress on the mold and the plastic part. • Ribs and Bosses: Features like ribs add strength but must be designed carefully to avoid thick sections that can cause sink marks. • Undercuts: Undercuts may require side actions or lifters, which add complexity and cost to the mold. 2.2 Material Selection The choice of plastic resin significantly affects mold design. • Thermoplastics vs. Thermosets: Thermoplastics like ABS or polypropylene have different flow and cooling requirements compared to thermosets. • Shrinkage Rate: Each material shrinks differently upon cooling. Mold cavities must account for this shrinkage to ensure accurate final dimensions. • Chemical Resistance and Strength: Certain applications (e.g., medical, automotive) demand materials that can resist chemicals, heat, or impact, which influences mold construction. 2.3 Number of Cavities Deciding the number of cavities in a mold affects production efficiency and cost. • Single-Cavity Molds: Lower cost, easier to maintain, but less efficient for high-volume production. • Multi-Cavity Molds: Higher output per cycle, but require precise balance of melt flow and cooling to maintain quality. • Family Molds: Multiple parts in one mold, ideal for assemblies, but must be carefully designed to avoid uneven filling. 2.4 Mold Base and Steel Selection Mold base materials directly impact durability and cost. • Hardened Steel: Best for long production runs; more expensive but durable. • Pre-hardened Steel: Suitable for medium runs, easier to machine. • Aluminum: Lower cost, faster machining, ideal for prototypes or short runs, but limited lifespan. The choice depends on the production volume, resin type, and budget. 2.5 Cooling System Design Cooling is one of the most critical elements in mold design because it directly affects cycle time. • Cooling Channels: Must be strategically placed to ensure uniform cooling. Poor cooling design can cause warpage or uneven shrinkage. • Conformal Cooling: Advanced method using 3D printing to create cooling channels that follow the contour of the part. • Cooling Time: Often accounts for 60–70% of the cycle, so optimization here saves significant cost. 2.6 Gating System The gate is the entry point where molten plastic flows into the cavity. Its type and placement affect flow, filling, and appearance. • Gate Types: Edge gate, pin gate, submarine gate, hot runner gate, etc. • Location: Must minimize weld lines, air traps, and flow hesitation. • Size: Too small causes incomplete filling; too large leaves excessive vestige. 2.7 Runner System The runner directs the molten plastic from the sprue to the gates. • Cold Runner: Simple and cost-effective but wastes material. • Hot Runner: Eliminates material waste and improves cycle times but is more expensive and complex. Choosing the right system depends on cost, part requirements, and production volume. 2.8 Venting Vents allow trapped air and gases to escape from the mold during injection. • Poor venting can cause burns, short shots, or poor surface finish. • Vents are usually 0.02–0.05 mm deep to allow gas out without flashing plastic. 2.9 Ejection System Once the part solidifies, it must be ejected without damage. • Ejector Pins: Common method, but must be placed strategically to avoid visible marks. • Stripper Plates: Useful for delicate parts. • Air Ejection: Helps release thin-walled or flexible parts. A poorly designed ejection system can deform parts or damage the mold. 2.10 Tolerances and Surface Finish Injection molds must meet strict tolerances to ensure product consistency. • Tolerances: Influenced by material shrinkage, tool wear, and machine capability. • Surface Finish: Polished, textured, or matte finishes depend on product requirements. 2.11 Mold Flow Analysis (MFA) Modern injection mold design relies heavily on simulation software. • Predicts flow, pressure, cooling, and warpage before actual mold manufacturing. • Identifies potential issues like weld lines, sink marks, or voids early. 2.12 Production Volume and Cost Mold design decisions should align with expected production volume. • High-volume production: Invest in durable steel, multi-cavity molds, hot runners, and optimized cooling. • Low-volume production: Aluminum molds, cold runners, or simplified designs are more cost-effective. 2.13 Maintenance and Repair Considerations Mold longevity depends on ease of maintenance. • Inserts, bushings, and wear plates should be replaceable. • Access to cooling channels and ejector pins must allow easy cleaning and repair. 2.14 Safety and Compliance For industries like medical devices, food packaging, or automotive, compliance with standards is non-negotiable. • FDA, ISO, or automotive-specific certifications may dictate design choices. • Mold must prevent contamination, ensure precision, and support regulatory documentation.

  3. Economic Factors in Mold Design While technical considerations are crucial, economics play a decisive role in mold design:

  4. Initial Tooling Cost: High upfront investment, especially for multi-cavity steel molds.

  5. Production Efficiency: Optimized cooling and gating reduce cycle time, lowering per-part cost.

  6. Material Usage: Hot runners minimize waste, but may not justify cost for small runs.

  7. Return on Investment (ROI): Designers must balance upfront cost against long-term production benefits.

  8. Common Mistakes in Mold Design Even experienced designers can make errors. Common mistakes include: • Ignoring draft angles, causing ejection issues. • Poor venting, leading to burn marks. • Uneven cooling, causing warpage. • Misplaced gates, resulting in weld lines. • Overcomplicated designs, raising unnecessary costs.

  9. The Future of Injection Mold Design Technology is reshaping mold design practices: • 3D Printing (Additive Manufacturing): Enables rapid prototyping and conformal cooling channels. • AI and Simulation: Smarter mold flow analysis with predictive adjustments. • Sustainability Focus: Designing molds for recycled materials and energy-efficient production. • Digital Twin Technology: Creating a virtual replica of the mold to monitor performance and predict maintenance.

Conclusion Injection mold design is both an art and a science. From part geometry and material selection to cooling, gating, venting, and cost considerations, each factor plays a role in ensuring efficient production and high-quality results. A well-designed mold reduces cycle times, prevents defects, and ensures long-term reliability, while a poorly designed one can lead to expensive downtime and quality issues. By carefully evaluating all the factors in injection mold design—technical, material, and economic—you can create molds that deliver precision, durability, and profitability. As new technologies like AI and 3D printing emerge, the future of mold design will be even more optimized, efficient, and sustainable.

0 Comments 1 Vote Created
Small2_plastic_injection_mold_defects-cover

Plastic injection molding is one of the most widely used manufacturing processes for producing high-volume, complex, and precise plastic parts. From automotive components to consumer goods, medical devices, and packaging, this process provides efficiency and consistency. However, even with advanced machinery and high-quality molds, defects can still occur during production. These defects not only compromise product quality but also increase scrap rates, downtime, and costs. Understanding the common plastic injection molding defects—their causes, prevention, and solutions—is crucial for manufacturers aiming for consistent, high-quality output. This article explores the most common defects in injection molding, providing in-depth explanations and actionable solutions.

  1. Short Shots Definition: A short shot happens when molten plastic does not completely fill the mold cavity, leaving incomplete parts with missing sections. Causes: • Insufficient injection pressure. • Inadequate venting, leading to trapped air. • Low melt temperature causing poor flowability. • Improper gate design or small gate size. • Material with low flow characteristics. Prevention & Solutions: • Increase injection pressure and speed. • Raise melt and mold temperature for better flow. • Improve venting to release trapped gases. • Redesign gates and runners to allow smoother material flow. • Use materials with higher melt flow index (MFI).

  2. Flash Definition: Flash occurs when molten plastic leaks out of the mold cavity, creating excess thin layers of plastic along parting lines or ejector pin locations. Causes: • Worn-out or damaged mold components. • Excessive injection pressure. • Insufficient clamping force. • Misaligned mold halves. Prevention & Solutions: • Regularly maintain and repair mold components. • Optimize injection pressure to avoid excess force. • Ensure proper mold alignment and sufficient clamping force. • Use high-precision machining for critical mold areas.

  3. Sink Marks Definition: Plastic injection molding sink marks are small depressions or dents on the surface of a molded part, typically caused by uneven cooling or thick sections. Causes: • Excessive wall thickness. • Insufficient packing pressure during solidification. • Poor cooling design. • Material shrinkage. Prevention & Solutions: • Maintain uniform wall thickness in part design. • Increase packing/holding pressure and time. • Optimize cooling system design to ensure even heat distribution. • Add ribs or gussets instead of using thick walls.

  4. Warpage Definition: Warpage occurs when parts deform or twist after ejection due to uneven shrinkage or residual stress. Causes: • Uneven cooling across part surfaces. • Poor part design with varying wall thickness. • High injection pressure or temperature. • Improper material selection. Prevention & Solutions: • Design parts with uniform wall thickness. • Improve cooling channel placement for uniform heat removal. • Adjust processing parameters to reduce stress. • Select materials with lower shrinkage rates.

  5. Weld Lines Definition: Weld lines (also called knit lines) are visible lines formed where two flow fronts of molten plastic meet and fail to bond properly. Causes: • Low melt temperature. • Poor venting causing air entrapment. • Complex part design requiring multiple flow fronts. • Insufficient injection speed. Prevention & Solutions: • Increase melt and mold temperatures. • Adjust gate placement to reduce multiple flow fronts. • Improve venting to allow smooth material flow. • Increase injection speed for stronger bonding.

  6. Voids and Bubbles (Blistering) Definition: Voids are empty pockets inside the molded part, while bubbles appear as trapped air or gas on the surface. Causes: • Insufficient packing pressure. • Trapped air due to poor venting. • Moisture in raw material. • High melt temperature causing gas release. Prevention & Solutions: • Increase packing pressure and holding time. • Dry raw materials thoroughly before processing. • Improve venting system to release trapped gases. • Adjust injection temperature to prevent gas formation.

  7. Burn Marks Definition: Burn marks appear as dark brown or black discolorations on the surface of molded parts. Causes: • Trapped air or gas compressed at high temperatures. • High injection speed leading to overheating. • Insufficient venting. Prevention & Solutions: • Improve mold venting to release gases. • Reduce injection speed and pressure. • Lower melt temperature to prevent overheating.

  8. Jetting Definition: Jetting occurs when molten plastic enters the cavity at high velocity, forming snake-like flow patterns before the mold fills properly. Causes: • Improper gate location. • High injection speed. • Low melt temperature causing poor flow. Prevention & Solutions: • Relocate gates to allow smoother material entry. • Reduce injection speed. • Increase melt and mold temperature for better flow.

  9. Delamination Definition: Delamination is when thin surface layers of the molded part peel away, reducing strength and appearance. Causes: • Contamination in raw materials. • Incompatible resin blends. • Excessive mold release agents. • Poor bonding due to low melt temperature. Prevention & Solutions: • Use clean, compatible raw materials. • Dry materials properly. • Avoid excess mold release agents. • Optimize processing temperatures for strong bonding.

  10. Discoloration Definition: Discoloration is an unwanted change in color or streaks on the molded part. Causes: • Contamination in material or hopper. • Excessive residence time in barrel. • Overheating of resin. • Improper mixing of colorants. Prevention & Solutions: • Clean hopper, barrel, and screw regularly. • Use color masterbatches compatible with base resin. • Optimize processing parameters to prevent overheating. • Avoid long residence times inside the barrel.

  11. Surface Delays: Flow Lines and Tiger Stripes Flow Lines: Visible streaks or wave-like patterns caused by cooling during incomplete filling. Tiger Stripes: Dark lines appearing parallel to flow direction. Causes: • Inconsistent injection speed. • Sudden changes in wall thickness. • Poor mold temperature control. Prevention & Solutions: • Optimize injection speed and pressure. • Redesign part with smooth transitions. • Maintain consistent mold temperature.

  12. Ejector Marks Definition: Ejector marks are circular or shiny imprints left on the part by ejector pins. Causes: • Excessive ejector force. • Poor pin placement. • Insufficient draft angle. Prevention & Solutions: • Apply appropriate draft angles for easy ejection. • Relocate or redesign ejector pins to distribute force. • Reduce ejection force gradually.

  13. Splay Marks Definition: Splay marks appear as silver streaks or lines on the surface, often mistaken for scratches. Causes: • Moisture in raw material. • Air entrapment during injection. • Degraded resin due to overheating. Prevention & Solutions: • Dry hygroscopic materials (like ABS, Nylon, PET). • Lower melt temperature to avoid degradation. • Improve venting and optimize injection parameters.

  14. Warpage Due to Residual Stress Even if no visible defects appear immediately, residual stress can cause long-term deformation or cracking. Causes: • Uneven cooling. • High packing pressure. • Incompatible resin additives. Prevention & Solutions: • Optimize cooling design. • Balance holding pressure and time. • Use stress-relieving materials.

Best Practices to Minimize Injection Molding Defects 1. Part Design Optimization o Use uniform wall thickness. o Add draft angles. o Avoid sharp corners. 2. Mold Design Precision o Ensure proper gate, runner, and venting design. o Place cooling channels strategically. o Maintain high-quality surface finish. 3. Material Handling o Dry hygroscopic resins before processing. o Use clean, uncontaminated materials. o Match additives and colorants with resin type. 4. Process Control o Optimize injection pressure, speed, and temperature. o Monitor cooling times and cycles. o Regularly maintain equipment. 5. Simulation and Testing o Conduct mold flow analysis before manufacturing. o Run trial shots to identify issues early. o Adjust parameters before mass production.

Conclusion Defects in plastic injection molding are common, but they are not inevitable. By understanding the types of injection molding defects, their root causes, and preventive measures, manufacturers can significantly improve product quality, reduce waste, and optimize production efficiency. From short shots and flash to sink marks, weld lines, warpage, and bubbles, each defect points to specific issues in part design, mold design, material handling, or processing conditions. With proper design practices, advanced mold flow analysis, and strict process control, these defects can be minimized or even eliminated. A proactive approach not only reduces costs but also ensures higher customer satisfaction and long-term business success.

0 Comments 1 Vote Created
Small2_mold_in_die_casting

Die casting is one of the most efficient and widely used metal manufacturing processes. From automotive engine components to consumer electronics housings, die casting enables the production of complex, high-precision metal parts at scale. At the heart of this process lies the mold—a specially engineered tool that shapes molten metal into the final product. But what exactly is a mold in die casting? How is it designed, manufactured, and maintained? Why is it so crucial to the success of die casting? This article provides a comprehensive guide to help you understand die casting molds (also called dies), their construction, working principles, materials, design considerations, challenges, and future trends.

  1. Introduction to Die Casting Before we define the mold, let’s briefly review die casting itself. Die casting is a metal casting process that forces molten non-ferrous metals—such as aluminum, zinc, or magnesium—into a mold cavity under high pressure. Once the metal cools and solidifies, the mold opens, and the finished part is ejected. This process is widely used because it offers: • High production rates • Excellent dimensional accuracy • Smooth surface finishes • Ability to cast complex geometries • Consistency in mass production

  2. What is a Mold in Die Casting? In die casting, the mold (or die) is the tool used to shape molten metal into the desired part. It functions similarly to molds in plastic injection molding, but it must withstand much higher temperatures and pressures due to molten metal instead of plastic. A die casting mold is usually made of hardened steel and consists of two halves:

  3. Cover Die Half (stationary, attached to the machine)

  4. Ejector Die Half (movable, responsible for ejecting the part) When the two halves are clamped together, they form a mold cavity—an exact negative of the final part. Molten metal is injected into this cavity, solidifies, and takes the shape of the mold. In short, the mold is the backbone of die casting, determining part accuracy, quality, and cost efficiency.

  5. Components of a Die Casting Mold A mold is more than just two steel blocks. It’s an engineered system designed to handle molten metal efficiently. Key components include: 3.1 Mold Cavity and Core • The cavity is the hollow space shaped like the final part. • The core forms the internal features of the part (e.g., holes, recesses). 3.2 Gating System Channels that guide molten metal from the injection point to the mold cavity. Includes: • Sprue: Main channel where molten metal enters. • Runners: Horizontal channels that distribute metal to different cavities. • Gates: Openings that allow metal to enter the cavity. 3.3 Venting System Tiny vents that let trapped air escape from the cavity to prevent defects like porosity or incomplete filling. 3.4 Cooling System Channels through which water or oil circulates to regulate mold temperature. Cooling is critical for reducing cycle time and ensuring part quality. 3.5 Ejection System After solidification, ejector pins, plates, or sleeves push the casting out of the mold. 3.6 Slides and Lifters For parts with undercuts or complex geometries, slides and lifters help release the part without damaging it.

  6. Materials Used for Die Casting Molds Since molds face extreme conditions—molten metal temperatures up to 700°C, high pressure, and repeated mechanical stress—they must be made from durable materials. Common materials include: H13 Tool Steel  Most widely used.  Excellent toughness, thermal resistance, and wear resistance. Other Hot-Work Tool Steels (e.g., H11, H21)  Provide varying balances of strength, toughness, and thermal stability. Copper Alloys (as Inserts)  High thermal conductivity for faster cooling.  Typically used in mold inserts, not the entire mold. Coatings and Surface Treatments  Nitriding, PVD coatings, or thermal diffusion to enhance wear resistance and reduce soldering (metal sticking to mold). The choice of material depends on the casting alloy, production volume, and part complexity.

  7. Types of Die Casting Molds Die casting molds are classified based on application and complexity. 5.1 Single-Cavity Mold Produces one part per cycle. Used for larger or low-volume castings. 5.2 Multi-Cavity Mold Contains multiple identical cavities, allowing several parts to be produced in one cycle. Increases efficiency. 5.3 Combination (Family) Mold Houses cavities for different parts of the same assembly. Useful for components that must fit together. 5.4 Permanent vs. Temporary Molds • Permanent molds are steel dies designed for long production runs. • Prototype or soft tooling may use lower-cost materials for short runs.

  8. How Are Die Casting Molds Designed? Designing a die casting mold is a multidisciplinary engineering task. The process usually follows these steps: Step 1: Analyze Product Requirements • 3D CAD model of the part • Dimensional tolerances • Surface finish requirements • Expected production volume Step 2: DFM (Design for Manufacturability) Engineers optimize part design for efficient die casting: • Uniform wall thickness to prevent porosity • Draft angles for easy ejection • Avoiding sharp corners to reduce stress concentration Step 3: Mold Flow Simulation CAE tools simulate molten metal flow inside the cavity to optimize: • Filling pattern • Cooling performance • Air venting • Potential defects Step 4: Layout of Mold Systems Designers incorporate: • Gating and runner system • Cooling channels • Ejection system • Parting line position Step 5: Mold Material Selection Based on production volume, thermal stress, and cost. Step 6: CAD Modeling Complete 3D model of the mold with all inserts, pins, and moving components. Step 7: Mold Manufacturing Machined using CNC, EDM, polishing, and heat treatment. Step 8: Trial and Testing Prototype casting tests (T1, T2, T3) ensure mold quality before full production.

  9. Mold Maintenance and Lifespan Molds are expensive, often costing tens or hundreds of thousands of dollars, so maintenance is critical. Common Mold Maintenance Tasks • Cleaning and lubrication of moving parts • Inspection for cracks, wear, or deformation • Replacing worn ejector pins or inserts • Polishing to maintain surface finish Mold Lifespan • Aluminum die casting molds: 100,000 – 150,000 shots (depending on complexity) • Zinc die casting molds: Up to 1,000,000 shots due to lower melting temperature With proper care, molds can last years and produce millions of parts.

  10. Common Defects Related to Mold Design If a mold is poorly designed or maintained, the following defects may occur: • Porosity: Caused by trapped gas or shrinkage. • Flash: Thin excess metal along parting line due to poor clamping. • Cold shuts: Metal streams fail to fuse properly. • Soldering: Molten metal sticks to mold surface. • Hot spots: Localized overheating leading to poor mechanical properties. Good design, proper cooling, and preventive maintenance help minimize these issues.

  11. Cost Factors of Die Casting Molds Mold cost varies based on complexity and production needs. Factors include: • Size of the mold • Number of cavities • Part complexity (undercuts, thin walls, surface finish) • Mold material (H13 vs cheaper steels) • Expected production volume A simple mold may cost a few thousand dollars, while complex, multi-cavity molds for automotive parts can exceed $100,000–$200,000.

  12. Importance of Molds in Die Casting The mold determines: • Product quality (precision, strength, surface finish) • Cycle time (through cooling efficiency) • Production cost (tooling cost vs. efficiency trade-offs) • Manufacturing flexibility (ability to handle complex geometries) Without a well-designed mold, die casting would not achieve its hallmark advantages of speed, consistency, and cost efficiency.

Conclusion So, what is a mold in die casting? It is a precision-engineered steel tool that shapes molten metal under high pressure into finished parts. More than just a hollow block, a die casting mold is a complex system with cavities, cores, runners, cooling channels, ejectors, and vents—all working together to ensure consistent, defect-free production. From design and material selection to manufacturing and maintenance, mold engineering is the cornerstone of successful die casting. While molds are costly investments, they pay off through millions of reliable, high-quality parts. As the industry moves toward AI-driven design, additive manufacturing, and digital twin monitoring, the future of die casting molds promises greater efficiency, durability, and sustainability.

0 Comments 1 Vote Created
Small2_material_for_metal_injection_molding-cover

Metal injection molding (MIM) has become one of the most versatile manufacturing processes in modern industry, combining the design freedom of plastic injection molding with the strength of metals. But the true success of MIM depends heavily on the materials used. Choosing the right material is not just about availability—it directly affects mechanical performance, corrosion resistance, biocompatibility, cost, and overall efficiency. In 2025, industries such as automotive, aerospace, medical devices, and consumer electronics rely on MIM materials to deliver complex parts that meet demanding requirements. This guide explores the materials for metal injection molding in detail—highlighting their properties, applications, benefits, and challenges.

The Role of Materials in the MIM Process Before diving into the specific alloys, it’s important to understand why material selection is so critical in metal injection molding: 1. Flowability of Powder – The particle size and shape influence how well the feedstock fills the mold. 2. Shrinkage Control – Different alloys shrink differently during sintering, affecting dimensional accuracy. 3. Mechanical Properties – The final performance (strength, toughness, hardness) depends on material choice. 4. Surface Finish – Certain metals achieve smoother finishes after sintering. 5. Cost Efficiency – Raw material cost and ease of processing impact overall project economics. 👉 In short, the right material ensures high-quality parts, while the wrong choice may lead to poor density, weak performance, or excessive costs.

Major Categories of Materials for Metal Injection Molding 1. Stainless Steels Stainless steels are the most widely used materials in MIM. They combine strength, corrosion resistance, and versatility, making them ideal for industries ranging from medical devices to consumer electronics. Common Grades: • 316L Stainless Steel – Known for excellent corrosion resistance, especially in medical and marine environments. • 17-4 PH Stainless Steel – Precipitation-hardened alloy with high strength and wear resistance. • 410/420 Stainless Steels – Martensitic steels offering hardness and durability. Applications: • Surgical instruments and dental brackets • Watch cases and smartphone components • Automotive fuel injectors and turbocharger parts Advantages: • Excellent balance of strength and corrosion resistance • Wide availability of powders • Cost-effective compared to exotic alloys

  1. Low-Alloy Steels Low-alloy steels are commonly used in MIM for structural applications requiring toughness and wear resistance. Examples: • Fe-2%Ni • Fe-8%Ni • Fe-Cr-Mo blends Applications: • Automotive gears and locking mechanisms • Power tools and industrial machinery • Weapon components (triggers, firing pins) Advantages: • High strength-to-cost ratio • Good machinability and heat-treat response • Reliable for medium-stress applications

  2. Tool Steels When hardness and wear resistance are required, tool steels become the preferred choice. Popular Types: • M2 (High-Speed Tool Steel) – Excellent for cutting and machining tools. • D2 (High Carbon Tool Steel) – High hardness and wear resistance. Applications: • Cutting blades • Industrial tooling components • Molds and dies Advantages: • High hardness after heat treatment • Excellent wear resistance • Ideal for high-performance tools

  3. Titanium and Titanium Alloys Titanium has gained tremendous popularity in MIM, especially for medical and aerospace applications. Properties: • Lightweight yet strong • Biocompatible (safe for implants) • Excellent corrosion resistance Applications: • Orthopedic implants and dental implants • Aerospace brackets and lightweight housings • High-end consumer goods (eyewear, luxury watches) Advantages: • Unmatched strength-to-weight ratio • Long-term durability in demanding environments • High value in German and European medical sectors Challenges: • More expensive powders • Processing requires precise control during sintering

  4. Nickel and Cobalt-Based Alloys Nickel and cobalt alloys are essential for high-temperature and wear-resistant environments. Examples: • Inconel (Nickel-Based Superalloy) – Exceptional performance in aerospace turbines. • Cobalt-Chrome (Co-Cr) – Biocompatible and wear-resistant, used in dental and orthopedic implants. Applications: • Jet engine components • Medical implants and surgical instruments • Energy and power generation systems Advantages: • Excellent performance at elevated temperatures • High corrosion and wear resistance • Essential for aerospace and medical industries

  5. Magnetic Alloys For electronics and sensor industries, magnetic materials are increasingly important in MIM. Examples: • Fe-Si alloys • Soft magnetic stainless steels Applications: • Sensors and actuators • Electric motor components • Magnetic shielding in electronics Advantages: • High magnetic permeability • Ability to form intricate shapes • Essential for miniaturized electronics

  6. Tungsten and Carbide Materials Tungsten and carbide-based alloys are used in ultra-demanding applications requiring density and hardness. Examples: • Tungsten heavy alloys • Cemented carbides (WC-Co) Applications: • Radiation shielding components • Cutting and drilling tools • Military applications requiring high density Advantages: • Extremely high density • Excellent wear resistance • Withstands extreme conditions Challenges: • High processing difficulty • More expensive compared to steels

Factors Influencing Material Selection in MIM When selecting a material for metal injection molding, engineers must evaluate multiple factors: 1. Mechanical Requirements – Strength, toughness, fatigue resistance. 2. Corrosion Resistance – Especially critical in medical and marine industries. 3. Thermal Performance – High-temperature alloys for aerospace and automotive. 4. Biocompatibility – Titanium and cobalt alloys for implants. 5. Cost Considerations – Balance between performance and budget. 6. Production Volume – Economical scaling depends on material cost and powder availability.

Industry Applications of MIM Materials Automotive Industry • Stainless steels for fuel injection systems • Low-alloy steels for gears and locks • Magnetic alloys for EV sensors Medical Industry • Titanium for implants • Cobalt-chrome for joint replacements • Stainless steel for surgical tools Aerospace & Defense • Nickel alloys for turbines • Titanium alloys for lightweight structures • Tungsten alloys for defense systems Consumer Electronics • Stainless steel for watch cases • Titanium for premium gadgets • Magnetic alloys for smartphone sensors

Future Trends in MIM Materials As we move deeper into 2025 and beyond, several trends are emerging in material development: • Eco-friendly alloys – Focus on recyclability and sustainability. • Customized powders – Tailored for specific flowability and shrinkage control. • Hybrid materials – Combining MIM with additive manufacturing for unique alloys. • Growth of titanium use – Driven by Germany’s medical and aerospace sectors. • Magnetic innovations – Essential for electric mobility and sensor technology.

FAQs About Materials for Metal Injection Molding 1. What is the most commonly used MIM material? Stainless steel (316L, 17-4 PH) is the most common due to its balance of performance and cost. 2. Are titanium MIM parts expensive? Yes, titanium powders are costly, but their strength, lightweight nature, and biocompatibility justify the investment in medical and aerospace industries. 3. Can all metals be used in MIM? Not all. The material must be available as fine powders with the right properties for injection and sintering. 4. How strong are MIM materials compared to wrought metals? MIM parts can achieve 95–99% density, providing mechanical properties close to forged metals. 5. Which industries are driving new MIM material development? Medical implants, aerospace components, and electric vehicle manufacturers are pushing the development of advanced alloys.

Conclusion The materials for metal injection molding determine whether a project will succeed in terms of strength, cost, and performance. From cost-efficient stainless steels to advanced titanium and nickel alloys, the right choice allows manufacturers to meet the specific needs of automotive, aerospace, medical, and electronics industries. As of 2025, the demand for high-performance, sustainable, and specialized MIM materials continues to grow—particularly in Germany, where precision engineering and sustainability remain top priorities. Whether you need corrosion resistance, lightweight performance, or extreme hardness, there is a MIM material designed to meet your requirements. Selecting the right one will not only enhance product performance but also ensure cost efficiency and long-term success.

0 Comments 1 Vote Created
Small2_metal_injection_molding-2

Why Metal Injection Molding Matters, Metal injection molding (MIM) is a revolutionary production technology that bridges the gap between traditional metalworking and modern precision manufacturing. By combining plastic injection molding techniques with metal powders, manufacturers can create complex, high-performance metal components in large quantities. In Germany, a country known for precision engineering, automotive excellence, and medical technology leadership, metal injection molding has gained significant importance. From producing miniature gears for vehicles to surgical instruments and aerospace components, MIM enables the creation of parts that are both cost-effective and high-quality. This guide will provide you with a comprehensive overview of metal injection molding—covering process steps, materials, advantages, applications, costs, and future trends, with a focus on the German and European manufacturing market.

The Basics: What Is Metal Injection Molding? Metal injection molding is a powder metallurgy process that uses fine metal powders mixed with a binder material. The mixture, known as feedstock, is injected into a mold under high pressure. After molding, the binder is removed, and the part is sintered at high temperatures to achieve full metal density. In essence, MIM combines the design freedom of plastic injection molding with the strength and performance of metals. This makes it an ideal solution for industries where precision, strength, and complexity are required simultaneously.

Step-by-Step: The Metal Injection Molding Process 1. Feedstock Preparation The process begins with the creation of feedstock. Ultra-fine metal powders (particle sizes often below 20 microns) are mixed with a thermoplastic binder. The binder provides plasticity and allows the material to be injected. Key factors: • Powder size and shape influence density and surface finish. • The binder ratio typically ranges from 30–40%. • Homogeneous mixing is essential for consistency. 2. Injection Molding The prepared feedstock is injected into a precision mold using standard injection molding machines. This allows for high-volume production with excellent repeatability. Benefits of this stage: • Net-shape manufacturing: minimal machining required. • Ability to produce thin walls, sharp edges, and complex geometries. • Scalability for thousands or millions of identical parts. 3. Debinding After molding, the binder must be removed without damaging the fragile part. This stage is known as debinding. Common debinding methods: • Solvent debinding – dissolves certain binder components. • Thermal debinding – gradual heating removes remaining binder. The result is a porous “brown part” that is very delicate and requires careful handling. 4. Sintering The brown part is placed in a high-temperature furnace, typically ranging from 1200–1600°C depending on the alloy. During sintering: • The metal particles fuse together. • The part shrinks by 15–20%. • The final density reaches 95–99% of wrought metal. This step gives the component its mechanical strength, hardness, and final dimensions. 5. Post-Processing (Optional) Although MIM parts usually come out finished, some applications require additional steps such as: • Heat treatment for enhanced mechanical properties. • Coating or plating for corrosion resistance. • CNC machining for ultra-tight tolerances.

Advantages of Metal Injection Molding 1. Design Flexibility MIM allows engineers to create shapes that would be impossible or uneconomical with machining or casting. 2. Cost Efficiency at Scale Once molds are created, the per-part cost decreases significantly, especially for medium to large production volumes. 3. High Strength & Density MIM parts are nearly as strong as forged metals, making them suitable for demanding applications. 4. Material Versatility A wide range of metals and alloys can be used, including stainless steel, titanium, and nickel alloys. 5. Minimal Waste Unlike machining, which removes large amounts of material, MIM uses material very efficiently, reducing waste.

Materials Used in Metal Injection Molding One of the reasons MIM is so popular is the diversity of materials available. Here are some of the most commonly used alloys: • Stainless Steels (316L, 17-4 PH) – Ideal for medical and food-grade applications due to corrosion resistance. • Titanium & Titanium Alloys – Lightweight, biocompatible, and widely used in implants and aerospace. • Low-Alloy Steels – Common in automotive parts for strength and toughness. • Nickel & Cobalt-Based Alloys – Withstand high temperatures and wear, perfect for turbines and aerospace engines. • Magnetic Materials – Soft magnetic alloys for sensors and electronics. • Tungsten & Carbides – Extremely hard, suitable for wear-resistant components.

Applications of Metal Injection Molding MIM is used in a wide range of industries. In Germany, where engineering and manufacturing dominate, the following sectors are most active: Automotive Industry • Gears and transmission parts • Turbocharger components • Locking mechanisms and fasteners Medical Industry • Surgical instruments • Dental brackets and tools • Titanium implants Aerospace and Defense • Lightweight brackets and housings • High-temperature engine parts • Precision weapon components Consumer Electronics • Smartphone components • Laptop hinges • Watch cases Industrial Tools & Machinery • Cutting tools • Injection nozzles • Hydraulic parts

Cost of Metal Injection Molding The cost of MIM depends on several factors: • Mold creation – Initial investment is high but amortized over production volume. • Material type – Exotic alloys like titanium are more expensive. • Production volume – Economical at 10,000+ units per year. • Design complexity – More complex parts may require higher mold costs. ✅ In Germany, MIM is particularly cost-effective for automotive and medical industries, where volumes are high and complexity is essential.

Quality Control in Metal Injection Molding Since MIM parts are used in critical industries, strict quality assurance is essential. Methods include: • Dimensional inspection – Using CMM (Coordinate Measuring Machines). • Density testing – Ensures sintered parts reach required density. • Mechanical testing – Tensile, hardness, and fatigue tests. • Non-destructive testing (NDT) – X-ray and ultrasonic methods for internal defects.

Environmental Benefits of MIM Sustainability is becoming a key factor in German manufacturing. MIM contributes by: • Reducing raw material waste (compared to machining). • Enabling lightweight designs (reducing fuel consumption in cars & planes). • Using recyclable materials like stainless steel and titanium. With Germany’s focus on green technology, MIM aligns perfectly with long-term industry goals.

The Future of Metal Injection Molding in Germany and Beyond As we move into 2025 and beyond, several trends are shaping the MIM industry: 1. Medical Growth – Titanium implants and surgical devices are driving demand. 2. Electric Vehicles (EVs) – Lightweight, durable components for motors and battery systems. 3. Hybrid Manufacturing – Integration of MIM with additive manufacturing for faster prototyping. 4. Automation & Industry 4.0 – Robotics and AI-driven quality control improving efficiency. 5. New Materials – Development of high-performance alloys for aerospace and energy industries.

FAQs About Metal Injection Molding 1. Is metal injection molding expensive? It has a high upfront mold cost but is very cost-effective for medium to large volumes. 2. What is the minimum order volume for MIM? Typically, 5,000–10,000 parts per year is where MIM becomes economical. 3. How strong are MIM parts compared to machined parts? MIM parts reach 95–99% density, with mechanical properties similar to wrought metals. 4. Can MIM replace 3D metal printing? Not entirely. 3D printing is better for prototyping and low-volume complex parts, while MIM excels in high-volume production. 5. Is MIM environmentally friendly? Yes, it reduces waste and supports Germany’s sustainable manufacturing goals.

Conclusion Metal injection molding (MIM) is more than just a production method—it’s a strategic manufacturing solution for industries that demand precision, efficiency, and innovation. By offering design freedom, high material performance, and cost efficiency, MIM is revolutionizing production in Germany’s automotive, medical, aerospace, and electronics sectors. As 2025 unfolds, MIM is expected to become even more important in the global supply chain, helping companies achieve sustainability, cost-effectiveness, and high performance. If you’re looking for a way to produce complex, high-strength metal components at scale, metal injection molding is one of the most competitive solutions available today.

0 Comments 1 Vote Created

Xin Ling about 1 month ago
Small2_3d_printing_process-1

3D printing has rapidly evolved from a niche hobby into a mainstream technology, allowing everyday makers, designers, and enthusiasts to bring their ideas to life. For beginners, the challenge often lies not in learning how to operate the printer, but in figuring out what to print first. The good news is, you don’t need to be an engineer or an artist to create something useful, fun, and impressive. This article explores practical, creative, and beginner-friendly 3D printing ideas that will help you practice essential skills while producing items you can actually use in your daily life.

Why Start Small with 3D Printing? Before diving into the ideas, it’s important to understand why beginners should focus on simple prints: • Learning the basics: Starting with small objects helps you understand slicer settings, material flow, adhesion, and printer calibration. • Saving time and material: Large, complex projects take hours (sometimes days) and can be frustrating if something goes wrong. • Building confidence: Each successful print boosts your confidence and opens the door to more advanced designs. Think of your first prints as stepping stones—each one teaching you something new about your printer and the process.

Beginner-Friendly 3D Printing Ideas 1. Keychains and Name Tags Keychains are a fantastic beginner project because they are small, customizable, and quick to print. You can add your name, initials, or fun shapes using free design tools like Tinkercad. Printing a name tag for your backpack, luggage, or pet collar also helps you experiment with text and fonts. Skills Learned: Basic customization, scaling, and first exposure to supports (if needed).

  1. Cable Holders and Clips One of the most practical beginner projects is printing cable organizers. Whether it’s your phone charger or computer cables, these holders keep your desk clutter-free. Most designs are small, use little material, and finish in less than an hour. Skills Learned: Functional design, printing with precision.

  2. Phone Stands A phone stand is an ideal project for beginners who want something both useful and stylish. Designs range from simple single-piece holders to folding stands with moving parts. It’s a great way to test your printer’s ability to create angles and overhangs. Skills Learned: Understanding overhangs, print stability, and scaling for different devices.

  3. Bookmarks Flat, decorative, and customizable, bookmarks are a perfect beginner print. You can make them in fun shapes like animals, superheroes, or geometric designs. Since they use very little filament, they’re also budget-friendly. Skills Learned: Experimenting with thin structures, infill, and custom designs.

  4. Plant Pots and Mini Planters Mini planters are excellent beginner projects, especially if you enjoy home décor. Start with simple cylindrical or square pots, then move toward more decorative geometric styles. Pair them with succulents or cacti for a modern look. Skills Learned: Scaling objects, printing thicker walls, and experimenting with aesthetics.

  5. Bag Hooks or Wall Hooks Practical and easy to make, hooks are a great way to test your printer’s strength. You can create bag hooks for desks or wall hooks for coats and keys. It’s a functional project that introduces the idea of load-bearing prints. Skills Learned: Testing filament strength, experimenting with orientation for durability.

  6. Custom Coasters Coasters are simple flat objects, but they allow for endless creativity. You can design them with patterns, logos, or even cut-out shapes. Printing coasters helps you explore decorative design while producing something useful for the home. Skills Learned: Layer height adjustments, decorative infill patterns.

  7. Fidget Toys and Spinners Fidget toys, puzzle cubes, and spinners are fun beginner projects. They usually require small parts that snap together or spin freely. Printing toys introduces you to tolerances—how parts fit together without being too loose or too tight. Skills Learned: Printing moving parts, tolerances, post-processing assembly.

  8. Measuring Tools (Rulers, Calipers, Scoops) Printing your own measuring tools is a fun way to combine utility with learning. For example, you can print a simple ruler or even a scoop for coffee. While not as precise as professional tools, these projects help with accuracy and calibration. Skills Learned: Dimensional accuracy, scaling, calibration practice.

  9. Household Fixes and Replacement Parts One of the most satisfying aspects of 3D printing is creating parts you need around the house. Broken drawer handles, missing knobs, or custom spacers can be easily designed and printed. As a beginner, try replacing something simple like a knob for a cabinet or appliance. Skills Learned: Practical problem-solving, measuring existing parts, and design replication.

Tips for Beginner 3D Printers • Start with PLA: It’s the most forgiving filament—easy to print, low warping, and widely available. • Level your bed properly: Most failed prints come from poor bed adhesion. Take time to learn bed leveling. • Use online resources: Websites like Thingiverse, Printables, and Cults3D offer thousands of free beginner-friendly designs. • Experiment and iterate: Don’t be afraid to reprint an object with small adjustments until it’s just right. • Focus on quality, not speed: Slower prints with lower layer heights usually result in better outcomes.

Moving from Beginner to Intermediate Once you’ve mastered these starter projects, you’ll feel more confident tackling advanced designs like: • Articulated models (dragons, snakes, robots) • Multi-part assemblies (gears, hinges, toolboxes) • Customized gifts (personalized jewelry, photo frames) • Functional tools (phone cases, tripod mounts, camera rigs) The transition is smooth when you build skills gradually—each print teaches you a new lesson in design, materials, or printer settings.

Conclusion For beginners, 3D printing is as much about the journey as the final product. By starting with simple, practical, and fun projects like keychains, phone stands, coasters, or mini planters, you’ll quickly gain the confidence and technical know-how to explore more advanced creations. The best part? Every print, no matter how small, is a unique reflection of your creativity. With time, patience, and curiosity, your 3D printer will become not just a tool, but a gateway to endless possibilities.

0 Comments 1 Vote Created
Small2_epdm_injection_molding-3

In the world of injection molding, selecting the right material is critical to a product's performance, durability, and cost-effectiveness. Among the many material options available, EPDM rubber and thermoplastics are two widely used categories—but they serve very different purposes and behave quite differently during the injection molding process. This comprehensive guide explores the key differences between EPDM and thermoplastics in injection molding, comparing their physical properties, molding behavior, typical applications, cost considerations, and more. Whether you're a product designer, engineer, or manufacturer, understanding these differences can help you make better decisions when specifying materials for molded parts.

  1. What Is EPDM? EPDM stands for Ethylene Propylene Diene Monomer, a type of synthetic rubber. It’s known for excellent weather resistance, flexibility, and resilience. EPDM belongs to the family of elastomers, which are polymers with viscoelasticity—commonly referred to as “rubbery” materials. Key Properties of EPDM: • Excellent UV and ozone resistance • High resistance to heat and cold • Superior weatherability • Outstanding flexibility and compressibility • Good electrical insulation properties • Inherently non-polar (resistant to water and steam) • Typically requires vulcanization (curing) to set

  2. What Are Thermoplastics? Thermoplastics are a class of polymers that become soft and moldable when heated and harden when cooled—a process that is reversible and repeatable. They are among the most commonly used materials in plastic injection molding because of their versatility and recyclability. Common Types of Thermoplastics: • Polypropylene (PP) • Polyethylene (PE) • Acrylonitrile Butadiene Styrene (ABS) • Polycarbonate (PC) • Nylon (PA) • Polystyrene (PS) • Thermoplastic elastomers (TPE/TPU)

  3. Injection Molding Process: EPDM vs. Thermoplastics The injection molding process varies significantly depending on whether you are using EPDM or thermoplastics. Molding EPDM EPDM is a thermoset elastomer, which means it does not melt but undergoes a chemical curing reaction (vulcanization) when heated. Once cured, it cannot be re-melted. Key Characteristics: • Requires rubber injection molding machines • Material is injected in an uncured (plastic-like) state • Curing (cross-linking) occurs inside the mold under heat and pressure • Typically longer cycle times due to vulcanization • Mold temperatures often range from 150–200°C (302–392°F) • Cannot be remolded or recycled once cured

Molding Thermoplastics Thermoplastics, on the other hand, melt when heated and solidify when cooled. The process is physical, not chemical. Key Characteristics: • Uses standard plastic injection molding machines • Material is melted and injected into the mold • Cooling and solidification occur in the mold (no chemical change) • Faster cycle times compared to EPDM • Mold temperatures vary based on material (often 50–120°C) • Thermoplastics can be reprocessed and recycled

  1. Applications: EPDM vs. Thermoplastics EPDM Applications EPDM is widely used in applications that require weather resistance, sealing, or high flexibility over time. Common Uses: • Automotive weatherstripping and seals • HVAC gaskets and seals • Roof membranes • Electrical insulation • Industrial hose and tubing • Washing machine door seals

Thermoplastics Applications Thermoplastics are used in a much broader range of applications because they can be engineered to exhibit a wide range of properties. Common Uses: • Consumer electronics housings • Automotive interior and structural parts • Medical devices • Packaging • Household goods • Toys • Appliances

  1. Design Considerations EPDM Design Guidelines Designing for EPDM injection molding requires attention to cure time, venting, and parting lines. • Avoid sharp corners to minimize stress points. • Include vents to allow gases to escape during curing. • Allow for shrinkage and post-curing expansion.

Thermoplastic Design Guidelines Designing for thermoplastics focuses on wall thickness, draft angles, and material flow. • Maintain uniform wall thickness to prevent warping. • Use proper draft angles for easier demolding. • Include ribs and gussets for strength without added weight.

  1. Cost Comparison

While the per-part cost of EPDM may be lower in raw material terms, the longer cycle time and complex tooling requirements often make thermoplastics more cost-efficient for high-volume production.

  1. Environmental Impact EPDM: • Not recyclable after curing • Less favorable from a sustainability standpoint • However, EPDM has a long lifespan, reducing replacement waste

Thermoplastics: • Thermoplastics are recyclable, which is a major advantage • Post-consumer recycling infrastructure is well-established • Biodegradable and bio-based alternatives are emerging (e.g., PLA)

  1. Hybrid Materials: TPE as the Middle Ground If you’re looking for rubber-like flexibility with thermoplastic processability, TPEs (Thermoplastic Elastomers) offer a viable compromise. These materials can be injection molded like thermoplastics while offering some of the softness and elasticity of EPDM. • Advantages: Faster cycle time, recyclable, no curing needed • Limitations: May not match EPDM’s heat and weather resistance

  2. Choosing Between EPDM and Thermoplastics The decision comes down to performance requirements, production volume, budget, and end-use environment. Choose EPDM if: • You need long-term weather, ozone, or UV resistance • You need a flexible seal or gasket • The part will experience compression and rebound

Choose Thermoplastics if: • You need high-volume, low-cost production • The part requires precision and a smooth finish • Recycling or reusability is important

Conclusion Both EPDM and thermoplastics have critical roles in injection molding, but they are suited to very different applications. EPDM offers durability, flexibility, and weather resistance that thermoplastics often can't match—especially in seals and outdoor environments. However, thermoplastics win in terms of speed, design flexibility, cost-efficiency, and sustainability. Choosing the right material involves balancing functional requirements with manufacturing realities. By understanding the key differences outlined in this article, you can make more informed decisions that optimize product performance, cost, and longevity.

Small2_7_type_food_grade_plastic-1

Plastic is everywhere in the food industry, from packaging and storage containers to kitchen tools and industrial food processing equipment. However, not all plastics are safe for food contact. To ensure consumer safety, only specific types of plastic are deemed food-grade, meaning they do not leach harmful chemicals into food or beverages.

In this article, we’ll explore the 7 main types of food-grade plastic, how to identify them, their common applications, and what makes them safe for food contact.

Understanding Food-Grade Plastic Food-grade plastic refers to plastic materials that meet strict standards established by regulatory bodies like the U.S. Food and Drug Administration (FDA), European Food Safety Authority (EFSA), and other national or international health authorities. These plastics are tested to ensure they don’t contain harmful toxins, won’t react with foods, and are safe under expected usage conditions (e.g., heat, cold, acidity).

Most food-safe plastics fall under one of the seven major resin identification codes, which are typically printed on the bottom of containers inside a triangle of arrows.

The 7 Types of Food-Grade Plastic 1. PET or PETE (Polyethylene Terephthalate) – #1 PET is a lightweight, strong, and clear plastic commonly used for food and beverage packaging.

Common Uses:  Water and soft drink bottles  Peanut butter jars  Salad dressing containers  Oven-ready meal trays

Why It’s Food Safe:  Resistant to moisture and gas  Does not contain BPA  Approved for single-use food packaging

Caution: PET is generally intended for single use. Repeated use or exposure to high heat (e.g., microwaving) can degrade its structure.

  1. HDPE (High-Density Polyethylene) – #2 HDPE is a dense, opaque plastic known for its strength and chemical resistance.

Common Uses:  Milk jugs  Juice bottles  Yogurt tubs  Cereal box liners  Cutting boards

Why It’s Food Safe:  Strong barrier against moisture  Highly resistant to chemicals  Doesn’t leach harmful substances

Bonus: HDPE is dishwasher safe and recyclable.

  1. PVC (Polyvinyl Chloride) – #3 PVC is a versatile plastic that can be rigid or flexible. However, its use in food applications is limited and highly regulated.

Common Uses:  Food cling wraps (when specially formulated)  Conveyor belts and tubing in food processing  Bottle seals

Why It’s Food Safe (with Conditions):  Requires the use of food-grade plasticizers (e.g., DOA or citric acid esters) for flexibility  Must comply with strict standards due to potential presence of phthalates or chlorine

Note: Not all PVC is food-safe—only specially manufactured formulations are approved for food contact.

  1. LDPE (Low-Density Polyethylene) – #4 LDPE is softer and more flexible than HDPE and is widely used in packaging.

Common Uses:  Bread bags  Frozen food bags  Squeeze bottles  Container lids  Food-grade film and wraps

Why It’s Food Safe:  Low chemical reactivity  Flexible, with good moisture barrier  Approved for direct food contact

Bonus: LDPE is microwave-safe in many applications, but it's best to check labels.

  1. PP (Polypropylene) – #5 Polypropylene is one of the most heat-resistant food-safe plastics, making it ideal for hot-fill applications.

Common Uses:  Yogurt cups  Take-out containers  Microwaveable containers  Bottle caps  Straws

Why It’s Food Safe:  Withstands high temperatures  Excellent chemical resistance  Does not leach toxins under heat

Bonus: PP is dishwasher and microwave safe, making it perfect for reusable food containers.

  1. PS (Polystyrene) – #6 Polystyrene can be rigid (like cutlery) or expanded into foam (like disposable coffee cups). Its food-grade status is debated.

Common Uses:  Disposable cutlery and plates  Meat trays  Egg cartons  Foam take-out containers

Why It’s (Sometimes) Considered Food Safe:  Approved for limited, single-use food contact  Stable at room temperature

Caution: Polystyrene may leach styrene when heated or with acidic/oily foods, so it’s not recommended for microwaving or reuse.

  1. Other Plastics – #7 (Including Polycarbonate and Bioplastics) Category #7 includes plastics not classified in the other six groups. It’s a broad category with varying safety profiles.

Common Uses:  Reusable water bottles  Baby bottles (older versions)  Food storage containers  Biodegradable plastics (PLA)

Why It’s Food Safe (Case-by-Case):  Some #7 plastics like polycarbonate were widely used, but concerns about BPA (Bisphenol A) have led to a shift toward BPA-free alternatives.  Bioplastics like PLA (Polylactic Acid) are increasingly used in compostable food containers and cutlery.

Important: Always check for “BPA-Free” or FDA-approved labeling when using #7 plastics for food.

Final Thoughts Understanding the 7 types of food-grade plastic is essential for safe food storage, packaging, and handling—whether you're a manufacturer, distributor, or everyday consumer. While many plastics are safe under normal use, always pay attention to:  Intended use (e.g., microwave or freezer safe)  Manufacturer certification (FDA, EFSA, etc.)  Signs of wear or damage, which may compromise safety

By choosing the right type of plastic for your needs and handling it correctly, you can ensure better food safety and environmental responsibility.

After reading this article if you are still unsure about which plastic is food grade or what type of plastic should be used for your product, contact REGO, as a professional injection molding manufacturer, we can provide you with professional advice and help you choose the right material, saving you the trouble.

0 Comments 1 Vote Created
Small2_how_to_find_a_reliable_injection_molding_manufacturer

Injection molding is a vital manufacturing process used to produce a wide variety of plastic parts—from everyday household items to complex automotive and medical components. Whether you're a startup with a new product design or an established business seeking to optimize your supply chain, finding a reliable injection molding manufacturer is critical to your success. A trusted partner can help ensure high product quality, cost-efficiency, and timely delivery.

However, the process of identifying and choosing the right manufacturer is not straightforward. With hundreds of companies offering similar services across the globe, how do you determine which one is the best fit for your project?

In this comprehensive guide, we'll walk you through the essential steps and considerations to find a reliable injection molding manufacturer that meets your quality, timeline, and budget requirements.

  1. Understand Your Needs and Specifications Before you begin your search, it's important to have a clear understanding of your own product and manufacturing requirements. This will allow you to communicate effectively with potential manufacturers and filter out those that aren't a good fit.

Key considerations include:  Material type: What kind of plastic do you need? ABS, PP, PC, Nylon, or something more specialized like medical-grade or food-safe plastics?

 Part size and complexity: Is your part small and simple, or large and intricate with complex geometries?

 Volume: Are you producing thousands of units or millions? Some manufacturers specialize in prototyping and low-volume runs, while others are better equipped for mass production.

 Tolerances and finishes: Do your parts need tight tolerances or specialized surface finishes like texturing or chrome plating?

 Regulatory requirements: Are your parts subject to specific certifications or standards (e.g., ISO 13485 for medical devices or ISO/TS 16949 for automotive)?

Knowing these details will help you communicate effectively and assess which manufacturers have the right capabilities.

  1. Research and Shortlist Potential Manufacturers Once you know what you're looking for, you can start researching potential manufacturers. Here are some common sources:

Online Directories and Platforms ThomasNet - U.S.-based directory for industrial suppliers. Alibaba / Made-in-China - Platforms that connect you with Chinese manufacturers. Be cautious, as not all listings are verified. MFG.com - A global platform for sourcing custom manufacturing services. Kompass - An international B2B directory.

Trade Shows and Exhibitions Attending industry trade shows like NPE (The Plastics Show), K Fair, or Chinaplas gives you an opportunity to meet suppliers face-to-face and assess their capabilities firsthand.

Industry Associations Associations like The Plastics Industry Association (PLASTICS) or SPI often have member directories that list verified companies.

Referrals Ask for recommendations from peers in your industry or within your professional network. First-hand experience is often the best indicator of reliability.

  1. Evaluate Technical Capabilities After you've identified a list of candidates, evaluate each manufacturer's technical capabilities to ensure they can meet your production requirements.

Tooling and Mold Making  Does the company have in-house tooling capabilities or do they outsource?  How experienced are they in mold design and fabrication?  Do they use advanced mold flow analysis tools?

Machinery and Equipment  What type of injection molding machines do they use? (Electric, hydraulic, or hybrid)  What tonnage range do they support?  Can they handle overmolding, insert molding, or two-shot molding?

Quality Control  Do they have a Quality Management System in place (e.g., ISO 9001, IATF 16949)?  What types of quality inspections and testing do they perform (e.g., dimensional checks, CMM, visual inspection)?  Do they offer PPAP (Production Part Approval Process) for automotive parts?

Value-Added Services  Can they assist with design for manufacturability (DFM)?  Do they offer secondary services like assembly, ultrasonic welding, pad printing, or packaging?

  1. Verify Experience and Track Record Experience in your specific industry or product category is a major advantage. An experienced manufacturer will not only understand technical requirements but can also help you avoid common pitfalls.

Here's how to verify their credibility:

Company History  How long have they been in business?  Are they financially stable?  Have they worked with well-known clients?

Portfolio and Case Studies  Ask for examples of similar parts they've produced.  Request case studies that demonstrate problem-solving ability or efficiency improvements.

Customer References  Ask to speak with existing customers.  Look for testimonials or reviews, especially from long-term clients.

  1. Assess Communication and Customer Service Clear, timely, and professional communication is a strong indicator of how a manufacturer will perform in the long run. Early interactions can reveal a lot about their responsiveness and transparency.

Ask yourself:  Do they answer your questions thoroughly?  Are they proactive in suggesting improvements or flagging concerns?  Do they offer a dedicated account manager or project engineer?  Do they communicate in your preferred language fluently?

Manufacturing often requires collaboration. A responsive and communicative partner will make the process smoother and help prevent delays or errors.

  1. Compare Pricing and Cost Structure While cost is an important factor, it should not be the sole determinant. Extremely low pricing may indicate compromises on material quality, tooling, or inspection procedures.

When comparing quotes, make sure you understand:  Tooling cost: One-time fee to create the mold, which can be significant.  Per-unit cost: Depends on volume, material, and complexity.  Shipping and logistics costs: Particularly relevant for overseas suppliers.  Payment terms: Are they flexible? Do they require a deposit upfront?

It's advisable to get quotes from at least 3-5 manufacturers for comparison.

  1. Conduct a Factory Audit (Virtual or Onsite) If possible, conduct a physical or virtual audit of the factory. Seeing the production floor, quality lab, and warehouse can help you assess capabilities beyond what's shown in brochures.

Key things to look for during a factory visit:  Cleanliness and organization of the facility  Condition and variety of machines  Quality control systems in place  Employee training and safety procedures  Warehouse storage and inventory control

If you can't visit personally, ask for a virtual tour or hire a third-party inspection agency.

  1. Test with a Trial Production Run Before committing to a large order, start with a small batch or trial run. This allows you to:  Validate part quality and tolerances  Identify potential design or manufacturing issues  Test shipping and lead time  Assess overall service and responsiveness

It's common to go through several iterations before full-scale production, especially for new or complex parts.

  1. Evaluate Location and Logistics The location of your manufacturer can impact lead times, shipping costs, and ease of collaboration. Consider the following:  Proximity to your assembly plant or customers: Local manufacturers offer faster delivery and easier communication.  Tariffs and duties: Sourcing from certain countries may incur additional import costs.  Supply chain resilience: Can the factory continue operating during disruptions like pandemics or geopolitical tensions?

Some businesses use a dual-sourcing strategy, working with both a domestic and an overseas manufacturer for risk mitigation.

  1. Review Contracts and IP Protection Before finalizing a partnership, ensure your legal and intellectual property interests are protected:  NDA (Non-Disclosure Agreement): Prevents the manufacturer from sharing your designs.  Manufacturing Agreement: Clearly outlines expectations, tolerances, timelines, and responsibilities.  Tooling ownership: Clarify who owns the mold—especially important if you decide to switch suppliers later.  IP protection laws: Choose suppliers in countries with enforceable IP laws.

It's advisable to consult with a legal expert, particularly when dealing with international partners.

Conclusion Finding a reliable injection molding manufacturer takes time, research, and due diligence—but the payoff is well worth the effort. A trustworthy supplier is not just a vendor, but a long-term partner who contributes to your product's quality, cost efficiency, and market success.

To recap, here's a checklist for selecting the right injection molding manufacturer: ✅ Understand your product and volume needs ✅ Research and shortlist candidates from trusted sources ✅ Evaluate technical capabilities and equipment ✅ Verify experience and customer references ✅ Assess communication and service quality ✅ Compare pricing and cost transparency ✅ Visit the factory (physically or virtually) ✅ Conduct a trial run before full production ✅ Consider logistics and location ✅ Secure contracts and protect your IP

With the right partner, you can bring your plastic part from concept to market with confidence. Take the time to vet your options, and don't be afraid to ask hard questions—after all, your product's success depends on it.

Small2_top_brand_for_window_cleaning_robot

Window cleaning robot is a new type of smart home appliances, it is a smart robot that can automatically help us clean the window glass, this robot was launched immediately attracted the attention of many consumers, in this era of smart home, who do not want to add more intelligent AI products for the home, so in the interest of this product at the same time, many consumers also have a question, window Cleaning robot really works? In this post, we'll explore this question more, what exactly is a window robot and is it really useful.

What is a window cleaning robot? Window cleaning robots are smart devices designed to clean glass surfaces. They work by attaching to the window glass through adsorption technology and wiping away dirt, dust and stains from the glass surface by moving back and forth across the surface multiple times. These robots are equipped with microfiber pads or brushes, and often come with a cleaner dispenser to enhance cleaning. For a more graphic analogy, you can think of them as sweeping robots on windows.

How do window cleaning robots work? The window cleaning robots on the market today all work in much the same way, and most of them work in the following way:

Attaching to the window: using adsorption or magnetic technology to secure to the glass surface. Navigating the surface: moving systematically across the window in programmed paths or using AI to determine the most efficient route. Cleaning the glass: removes dirt by wiping with a microfiber pad or brush, usually in combination with a cleaning agent. Safety features: built-in safety features such as battery backup and fall sensors to prevent accidents.

Advantages of using a window cleaning robot Saves Time: A significant advantage of window cleaning robots is that they save time. Cleaning windows manually can be a time-consuming and physically demanding activity, especially in large homes, buildings or housing designs with many windows. A window cleaning robot can operate autonomously, just come back and retrieve it at regular intervals, with which you can clean your windows while watching TV.

Safety: Some windows are designed to be located high up or on the outside of windows in high-rise homes. We usually don't put too much effort into cleaning windows in such locations, because it's a pain in the ass to do so, and because it's risky to do so. But with the Window Cleaning Robot, we can leave these high-risk, difficult tasks to it. And it does it for you efficiently, safely.

Consistency: When cleaning glass we are often annoyed by leaving water stains, but such a problem will not be there with window cleaning robots, these robots are programmed to clean windows with a consistent strength and rhythm all the time, together with microfiber brushes that specialize in cleaning the surface of the glass, which will ensure that you achieve the same cleaning results for every piece of glass in every location.

Ease of Use: Window cleaning robots are especially useful for people with physical limitations or mobility issues. They provide a labor-free way to keep windows clean.

Limitations of window cleaning robots Initial cost: as a high-tech household product, window cleaning robots are certainly going to be quite a bit more expensive to purchase than the tools purchased for traditional manual cleaning, but they are a very durable product, and the one-time cost investment frees up your hands and saves more labor and time costs later.

Cleaning results: while these robots can handle light to moderate dirt and grime, they may struggle with serious stains. Stubborn dirt, bird droppings, or other hard-to-remove stains may need to be handled manually.

Window types: Window cleaning robots are most effective when used on large, smooth surfaced glass surfaces. They may not be as effective on uneven, curved surfaces, poorly designed shapes, spliced glass surfaces or protruding window frames.

Practical applications Residential Use: For homeowners with large or multiple windows, window cleaning robots can be a practical solution for keeping windows clean without the hassle of manual cleaning. They are especially useful in high-rise apartments or homes with hard-to-reach windows.

Commercial Buildings: In commercial environments, window cleaning robots can be a valuable tool for maintaining the polished appearance of office buildings, hotels, and other venues. They can reduce the need for professional window cleaning services, resulting in cost savings in the long run.

Specialized Glass Surfaces: Some window cleaning robots are designed to work on other glass surfaces, such as shower doors, glass tables or mirrors, adding to their versatility.

Conclusion In summary window cleaning robots are a practical innovation for both residential and commercial environments. They can save time, and avoid the risks associated with cleaning window glass, but of course there are some drawbacks, that is, some stubborn stains can not do a very effective removal, and the function of these products is still limited to the cleaning of the glass, can not be cleaned window frames and other locations. But for daily window surface dust cleaning, keep the glass surface clean or have a very good effect. And as technology advances, these robots will become even more powerful and effective, becoming a powerful assistant in our daily home cleaning. If you are considering buying a window cleaning robot, you may want to take a look at Lincinco window cleaning robot product page, which has a detailed description of the product's features, which can help you better understand the performance characteristics of this type of robot.

Small2_10_reson_why_you_want_window_cleaning_robot

Keeping your windows spotless and gleaming can be a challenge, especially if you have large glass surfaces or windows in hard-to-reach areas. Window cleaning robots have become a popular solution, providing a safe and efficient way to keep your windows clean. With many brands entering the market, it's important to know which ones stand out in terms of quality, performance, and innovation. Here are the top five brands for window cleaning robots that have earned high marks from consumers.

  1. Lincinco Lincinco is renowned for designing cutting-edge window cleaning robots equipped with smart technology to deliver efficient, thorough, and safe cleaning. Their models, like the popular Lincinco LR28 and LR05A, feature advanced ultrasonic water spray systems, intelligent navigation, and powerful suction technology.

Key Features: Intelligent Path Planning: Lincinco robots use sophisticated algorithms to map and clean windows efficiently, covering every corner and edge. Automatic Water Spraying: The built-in ultrasonic sprayers ensure even water distribution, making it easy to remove tough dirt and grime. Voice Assistance and Safety Features: Lincinco robots include voice prompts and safety systems like UPS (Uninterruptible Power Supply) to prevent accidents in case of a power outage. Lincinco's robots are ideal for both residential and commercial use, making them a top choice for those looking for reliability and innovation in window cleaning technology.

  1. ECOVACS ECOVACS is a household name in the world of cleaning robots, known for their range of innovative and efficient products. The ECOVACS Winbot series has become a favorite for many, thanks to its user-friendly features and excellent performance on various glass surfaces.

Key Features: Strong Suction Power: With powerful suction capabilities, ECOVACS robots can securely attach to vertical glass surfaces, ensuring they stay in place while cleaning. Multiple Cleaning Modes: Options like deep cleaning, quick cleaning, and spot stain removal allow users to customize the cleaning experience based on their needs. Smart Navigation: The robots use sensors to detect obstacles and edges, making them suitable for frameless and framed windows. ECOVACS continues to innovate with every new model, making their window cleaning robots a dependable and high-quality choice.

  1. Mamibot Mamibot has built a reputation for creating versatile and robust window cleaning robots that cater to different cleaning needs. Their Mamibot W120-T model is one of the most advanced, featuring state-of-the-art technology for precision cleaning.

Key Features: High-Power Suction and Gyroscope Technology: Mamibot robots provide strong vacuum suction and use advanced gyroscope technology to navigate windows smoothly and efficiently. Versatile Applications: These robots can clean not only glass windows but also mirrors and shower doors, making them highly functional for homeowners. Bluetooth Control: The integrated Bluetooth functionality allows users to control and monitor the robot easily through a smartphone app. Mamibot's emphasis on convenience, reliability, and intelligent design makes them one of the top brands in the market.

  1. HOBOT HOBOT is a pioneer in the window cleaning robot industry, offering products that combine practicality and innovation. HOBOT robots are known for their high-tech features, durable build, and effectiveness in tackling even the most stubborn dirt and stains.

Key Features: AI Technology: HOBOT robots are equipped with AI for route planning, edge detection, and obstacle avoidance, ensuring a comprehensive cleaning process. Multiple Cleaning Pads: The interchangeable microfiber pads allow for a variety of cleaning options, from wet mopping to dry dusting. Quiet Operation: HOBOT robots are designed to operate quietly, making them suitable for use in both homes and offices without causing disruption. The brand's commitment to quality and technological advancement makes HOBOT a solid contender for top window cleaning solutions.

  1. AlfaBot AlfaBot is another well-regarded brand known for its highly efficient and affordable window cleaning robots. Their AlfaBot X7 model stands out with its innovative design and feature set, making window cleaning a breeze.

Key Features: Ultrasonic Water Spray: AlfaBot's automatic ultrasonic sprayer helps break down grime and dirt, delivering a thorough clean every time. Edge Detection and Safety Measures: The robots are equipped with advanced sensors to detect edges and avoid collisions, along with safety ropes to prevent falls. App and Remote Control: The combination of app-based control and a remote allows for flexible and convenient operation. AlfaBot's user-friendly and effective products have won over many consumers who value ease of use and advanced technology.

Conclusion The window cleaning robot market has expanded significantly, with top brands like Lincinco, ECOVACS, Mamibot, HOBOT, and AlfaBot leading the way. These brands offer unique features such as intelligent navigation, powerful suction, and user-friendly interfaces to make window cleaning a stress-free and efficient task. Depending on your specific needs and preferences, any of these brands can provide a reliable solution to keep your windows spotless.

Small2_6_in_1_hair_dryer_review-1

Traveling can be a delightful experience, but maintaining your hair routine on the go can be a challenge. One of the most essential tools for many people is a hair dryer. However, not all hair dryers are suitable for travel. In this article we will share with you how to find the best traveling hair dryer to ensure you stay stylish and comfortable on your adventures.

  1. Compact and Lightweight Design The primary characteristic of a travel hair dryer is its size. A compact and lightweight design is crucial, as it saves space in your luggage. Look for dryers that are foldable or have a streamlined profile that fits easily into your bag. A dryer that weighs under a pound is ideal for travelers who want to keep their baggage light.

  2. Dual Voltage Capability When traveling internationally, different countries use varying voltage levels. A dual voltage hair dryer can operate on both 110-120V and 220-240V, making it a versatile choice for globetrotters. This feature allows you to plug your hair dryer into outlets around the world without needing a bulky voltage converter, making it easier to maintain your hair routine.

  3. Fast Drying Technology Travel often means time constraints, so a hair dryer that offers quick drying capabilities is invaluable. Look for models equipped with powerful motors or advanced technology, such as ionic or ceramic heating elements, which can reduce drying time and minimize heat damage to your hair.

  4. Multiple Heat and Speed Settings Versatility is key when it comes to styling hair. A good travel hair dryer should have multiple heat and speed settings to cater to different hair types and styling needs. This feature allows you to customize your drying experience and ensure your hair looks great regardless of the environment.

  5. Cool Shot Button A cool shot button is an essential feature for setting your hairstyle after drying. This function helps to lock in your style and adds shine, which is especially useful when you're away from home and want your hair to look its best for outings or events.

  6. Durable Build Travel can be tough on your belongings, so look for a hair dryer made from durable materials that can withstand the rigors of being packed and unpacked frequently. A sturdy design will ensure your dryer lasts through multiple trips without compromising performance.

  7. Travel Accessories Some hair dryers come with useful travel accessories, such as a concentrator nozzle for precise styling or a travel pouch for easy storage. These accessories can enhance your travel experience and help you maintain your hair with ease.

  8. Affordable Price Point While investing in quality is important, it’s also wise to consider your budget. There are many high-quality travel hair dryers available at various price points. Aim for a balance between affordability and essential features to find the best value for your needs.

Conclusion Finding the best hair dryer for traveling involves considering factors like size, voltage compatibility, drying technology, and added features. By prioritizing these elements, you can enjoy effortless hair care on your travels, ensuring you look and feel great wherever you go. Whether you’re jetting off for a weekend getaway or an extended adventure, the right travel hair dryer can make all the difference in maintaining your style on the road.

0 Comments 1 Vote Created
Small2_what_is_ion_hair_dryer

Ionic hair dryers have gained popularity in recent years due to their ability to dry hair faster, reduce frizz, and leave hair looking shinier and smoother(about what is an ionic hair dryer, you can read on Lincinco blog). But how do these dryers actually work? The answer lies in the science of ions and how they interact with the moisture in your hair. Here's a closer look at the technology behind ionic hair dryers and why they are a game-changer for your hair care routine.

The Basics: What Are Ions? Before diving into how ionic hair dryers work, it's essential to understand what ions are. Ions are electrically charged particles. There are two types: Positive ions (cations) – Atoms or molecules that have lost one or more electrons, resulting in a positive charge. Negative ions (anions) – Atoms or molecules that have gained one or more electrons, giving them a negative charge.

Water molecules found in wet hair are naturally charged with positive ions. Ionic hair dryers emit negative ions, and this interaction between ions is at the heart of how these dryers work.

How Do Ionic Hair Dryers Work? An ionic hair dryer generates and releases negative ions during the drying process. Here’s how it works step by step:

  1. Generation of Negative Ions: Inside an ionic hair dryer, there is an ion generator or a component made of materials like ceramic or tourmaline. These materials emit negative ions when heated. As the dryer blows air, these negative ions are carried along with the airflow and come into contact with your hair.

  2. Breaking Down Water Molecules: Water molecules on the surface of wet hair carry positive charges. When the negative ions from the dryer interact with these positively charged water molecules, they break the molecules down into smaller particles. This process helps the water evaporate faster, speeding up the drying time.

  3. Sealing the Hair Cuticle: The negative ions also help to smooth and seal the outer layer of the hair, known as the cuticle. When the cuticle is sealed, the hair becomes smoother and reflects more light, giving it a shinier appearance. This is why ionic hair dryers are often touted for their ability to reduce frizz and add shine.

  4. Locking in Moisture: By breaking down water molecules into smaller particles, an ionic hair dryer allows some of the moisture to penetrate the hair shaft. This helps to lock in hydration and prevent the hair from becoming overly dry or brittle, which is a common issue with traditional high-heat dryers.

The Benefits of Ionic Hair Dryers Ionic hair dryers offer a range of benefits that make them a preferred choice for many people:

  1. Faster Drying Time: By breaking down water molecules more efficiently, ionic hair dryers speed up the evaporation process, allowing you to dry your hair faster. This is particularly useful for people with thick or long hair, who typically spend more time drying.

  2. Less Frizz: The negative ions smooth the hair cuticle and reduce static electricity, which is one of the main causes of frizz. This makes ionic dryers ideal for people with curly, wavy, or frizz-prone hair.

  3. Shinier Hair: When the cuticle is sealed and smooth, hair reflects more light, giving it a natural shine. Ionic hair dryers enhance this effect, leaving your hair looking polished and sleek.

  4. Reduced Heat Damage: Since ionic dryers work by using ions to break down water molecules, they don’t require as much heat to dry the hair. This reduces the exposure to high temperatures, which can cause damage such as dryness, split ends, and breakage.

  5. Hydration and Moisture Retention: Ionic hair dryers help lock in moisture by allowing smaller water particles to penetrate the hair shaft. This keeps hair hydrated, reducing the risk of dryness and maintaining the hair’s natural luster.

Are Ionic Hair Dryers Suitable for All Hair Types? While ionic hair dryers offer many benefits, they may not be the best choice for everyone. Here’s a look at how different hair types respond to ionic dryers:

Thick, Curly, or Frizzy Hair: Ionic hair dryers are a great option for people with thick, curly, or frizzy hair. They help reduce frizz and leave hair smoother and shinier. The quick drying time also helps manage long or coarse hair more efficiently.

Fine or Thin Hair: People with fine or thin hair may find that ionic hair dryers can make their hair look flat or limp. This is because the smoothing effect of the negative ions reduces volume, which can be a disadvantage for those looking to add body and texture to their hair. A non-ionic dryer or one with a balance of ionic and ceramic technology might be better for adding volume.

Damaged or Dry Hair: Ionic hair dryers are often recommended for people with damaged or dry hair because they help lock in moisture and prevent further heat damage. By reducing drying time and using less heat, ionic dryers can help maintain hair health.

How to Use an Ionic Hair Dryer To get the most out of your ionic hair dryer, follow these tips:

  1. Towel Dry First: Before using an ionic hair dryer, always towel-dry your hair to remove excess water. This reduces the amount of time you’ll need to spend using the dryer.

  2. Use a Lower Heat Setting: Since ionic hair dryers dry hair faster, you can use a lower heat setting than you would with a traditional dryer. This minimizes the risk of heat damage.

  3. Work in Sections: Divide your hair into sections to ensure even drying. This is particularly important for people with thick or curly hair.

  4. Finish with a Cool Shot: Many ionic dryers have a cool shot button. Use this setting to lock in your style and add extra shine once your hair is dry.

Conclusion Ionic hair dryers revolutionize the way we dry our hair by harnessing the power of negative ions. By breaking down water molecules more efficiently and sealing the hair cuticle, they speed up drying times, reduce frizz, and leave hair looking shinier and smoother. While particularly beneficial for those with thick, curly, or frizz-prone hair, anyone can enjoy the advantages of an ionic hair dryer if used correctly. With less heat damage and quicker drying, ionic dryers are a great investment for healthier, more beautiful hair.